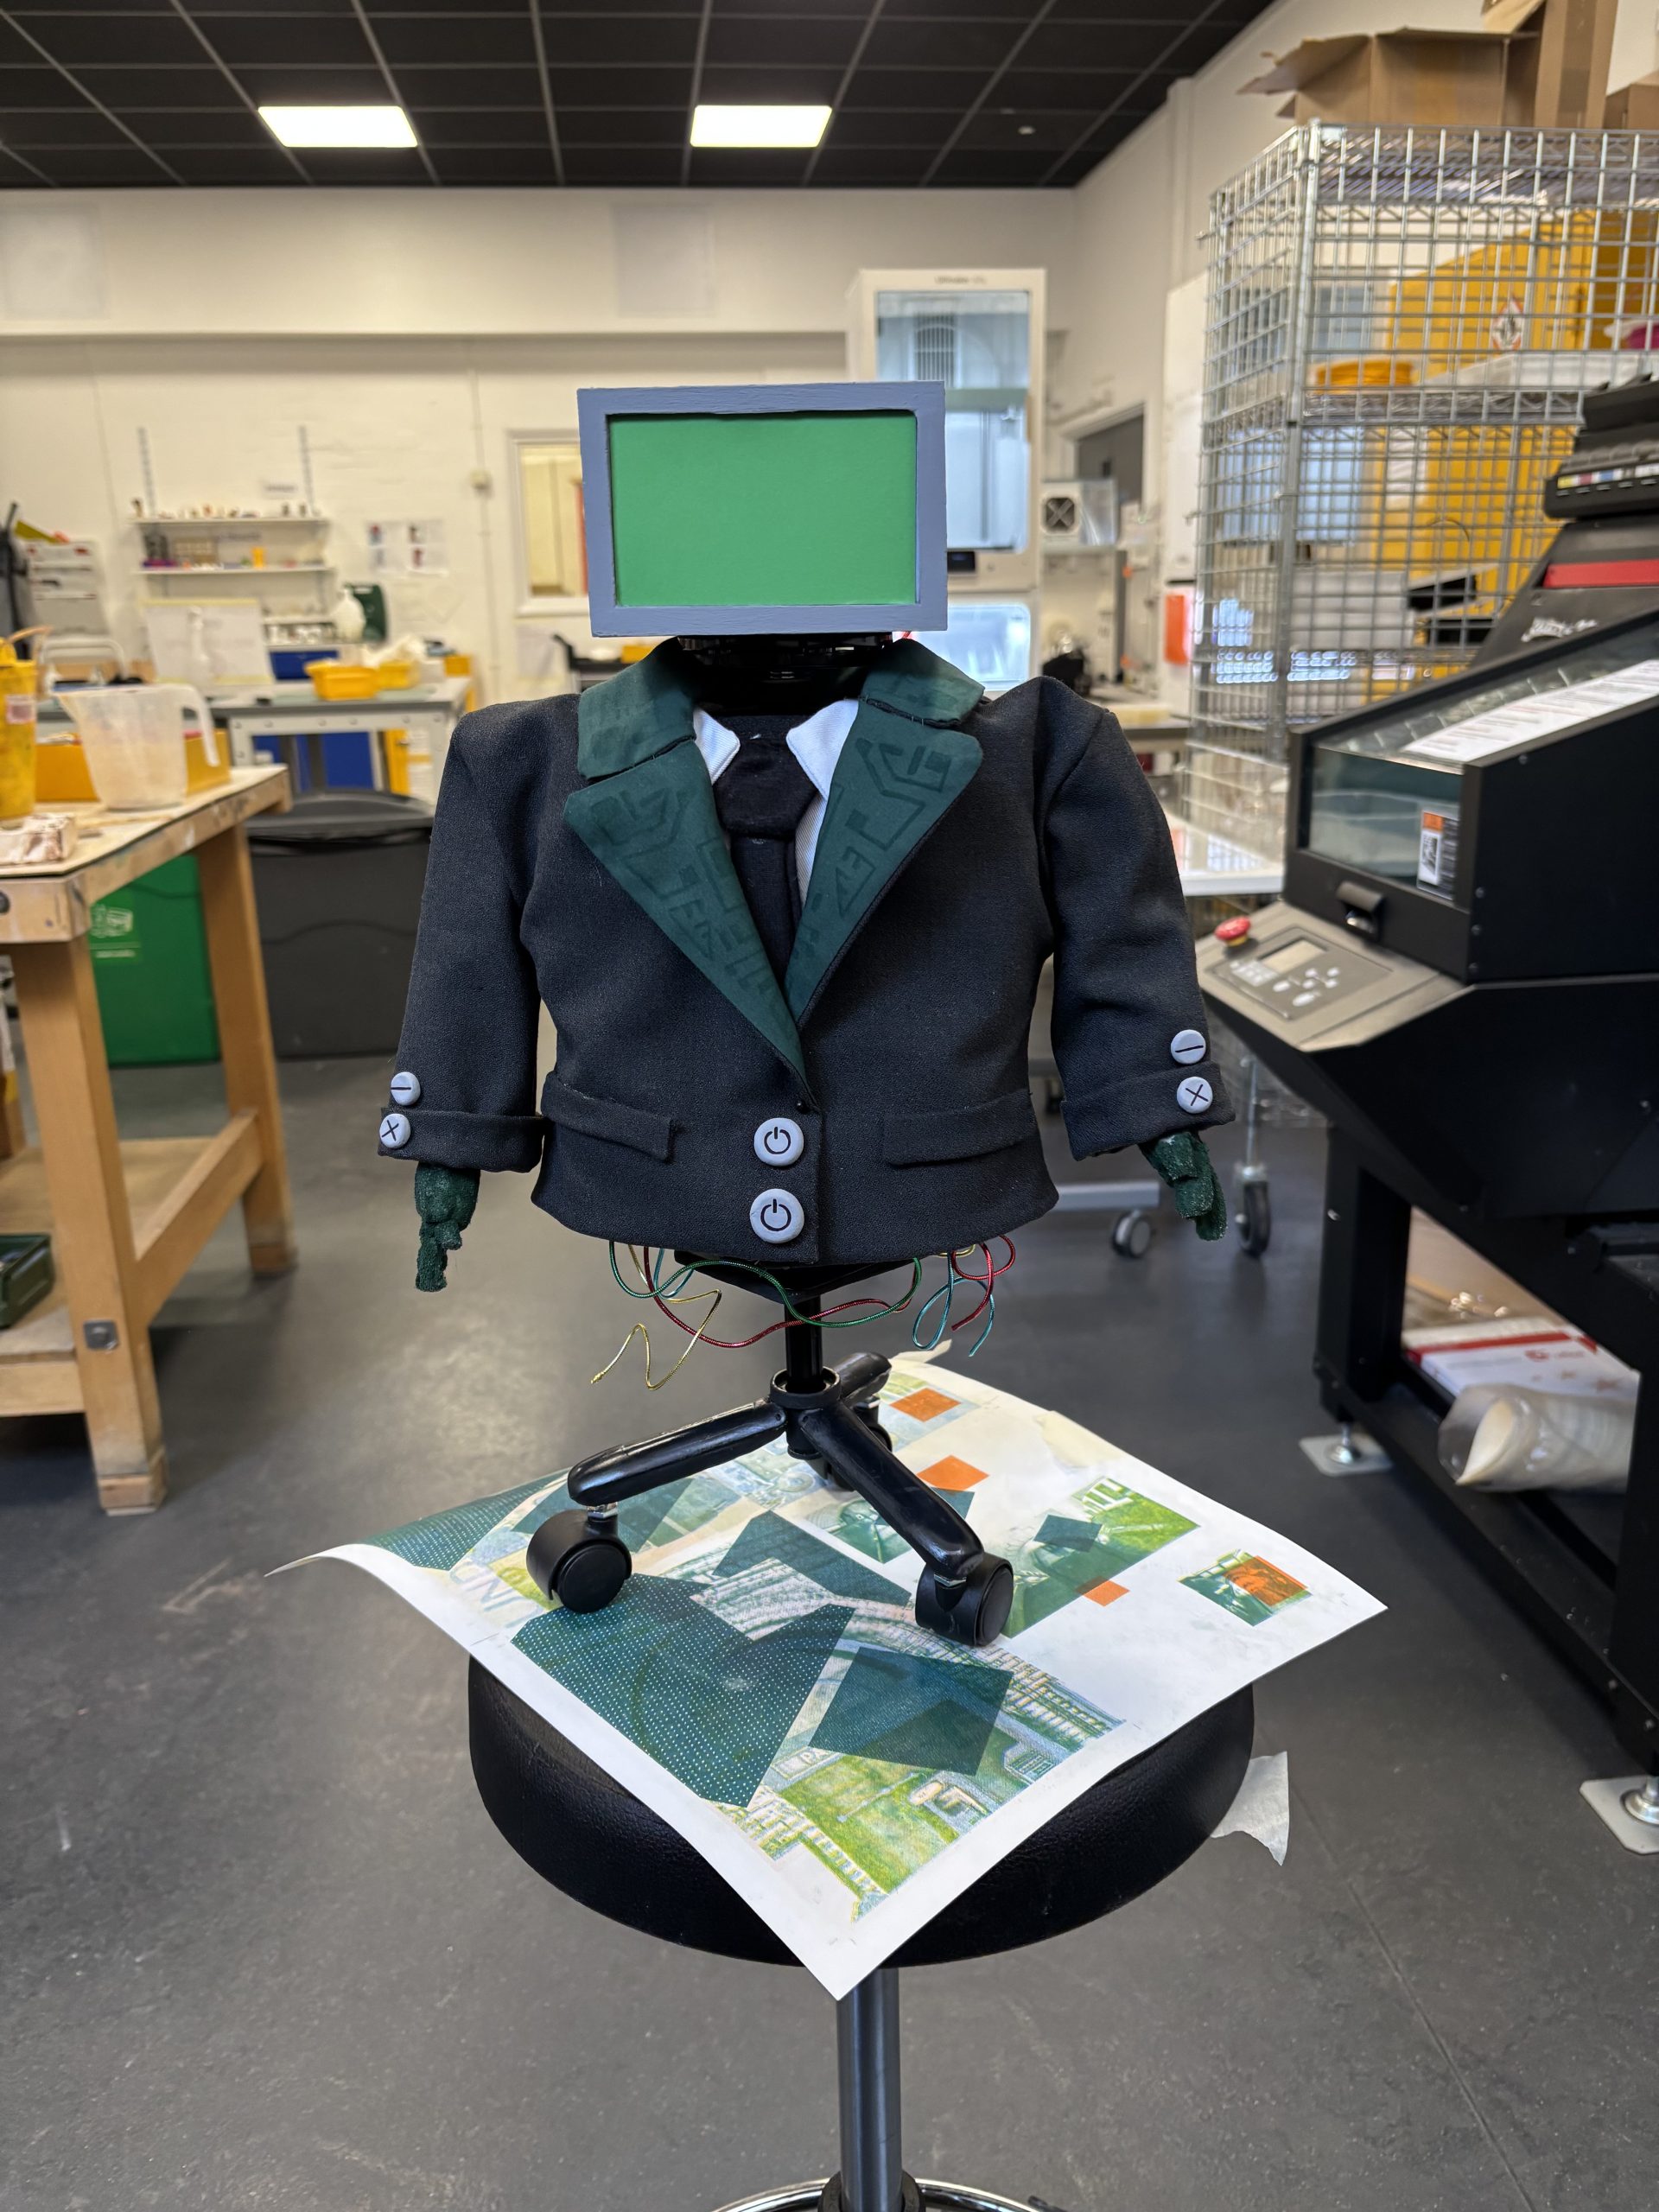
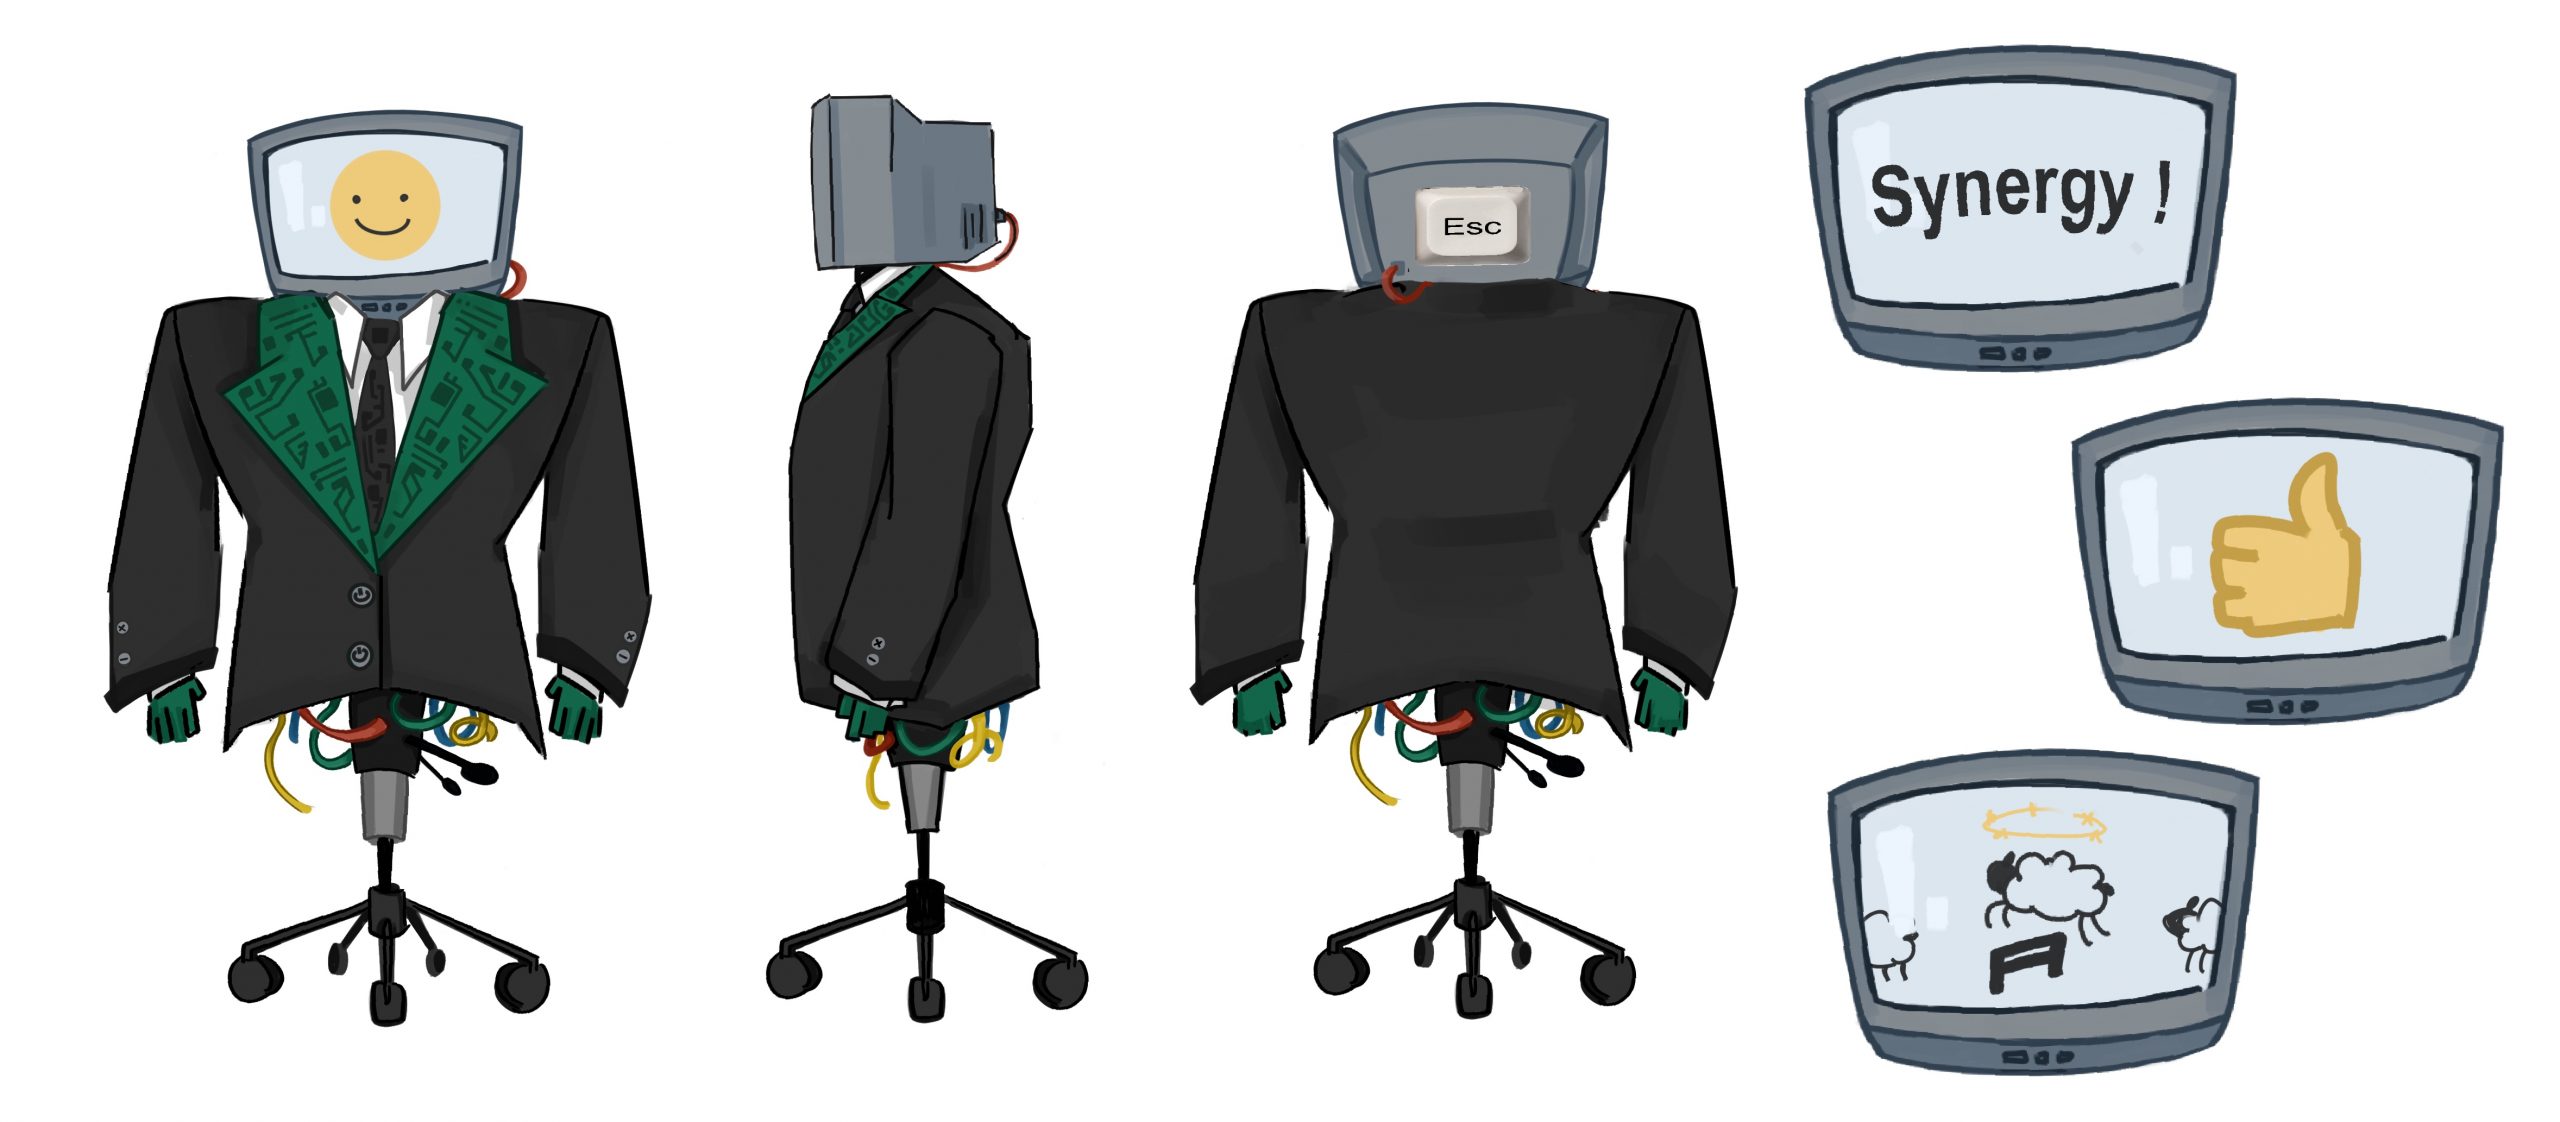
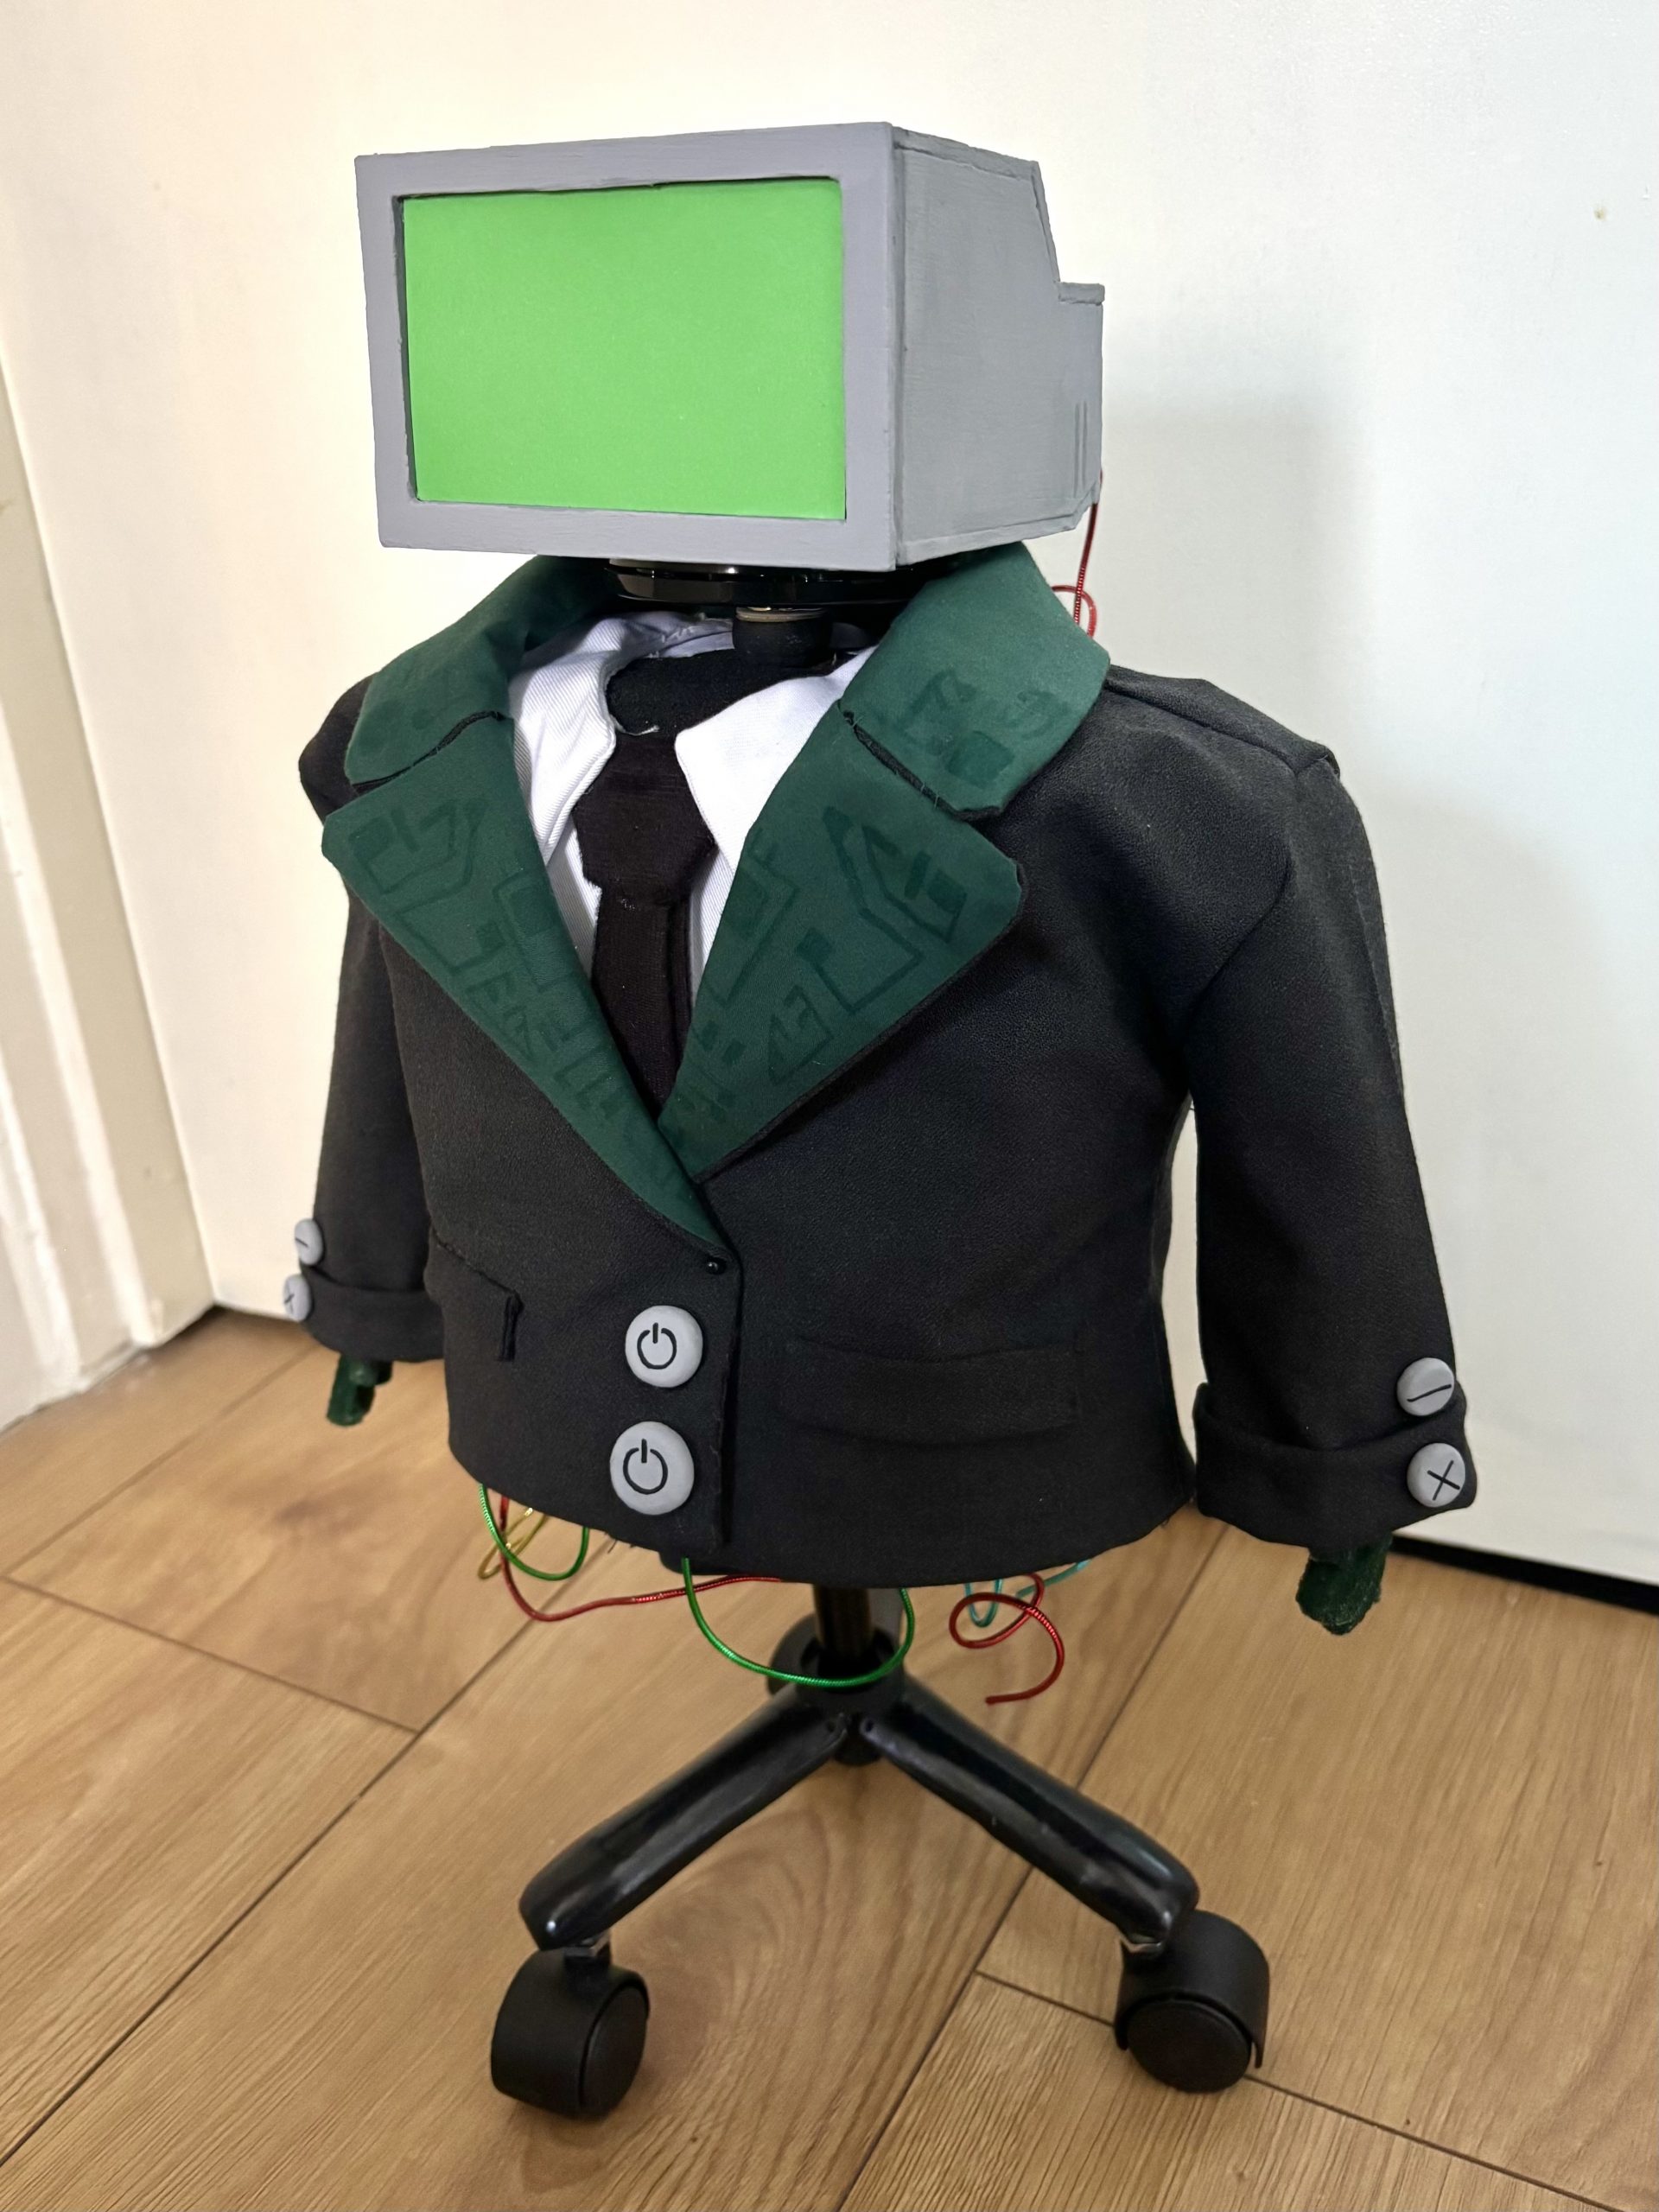
I took on the task of making our stop motion puppet of the boss! I would have to create my design as accurately as I could.
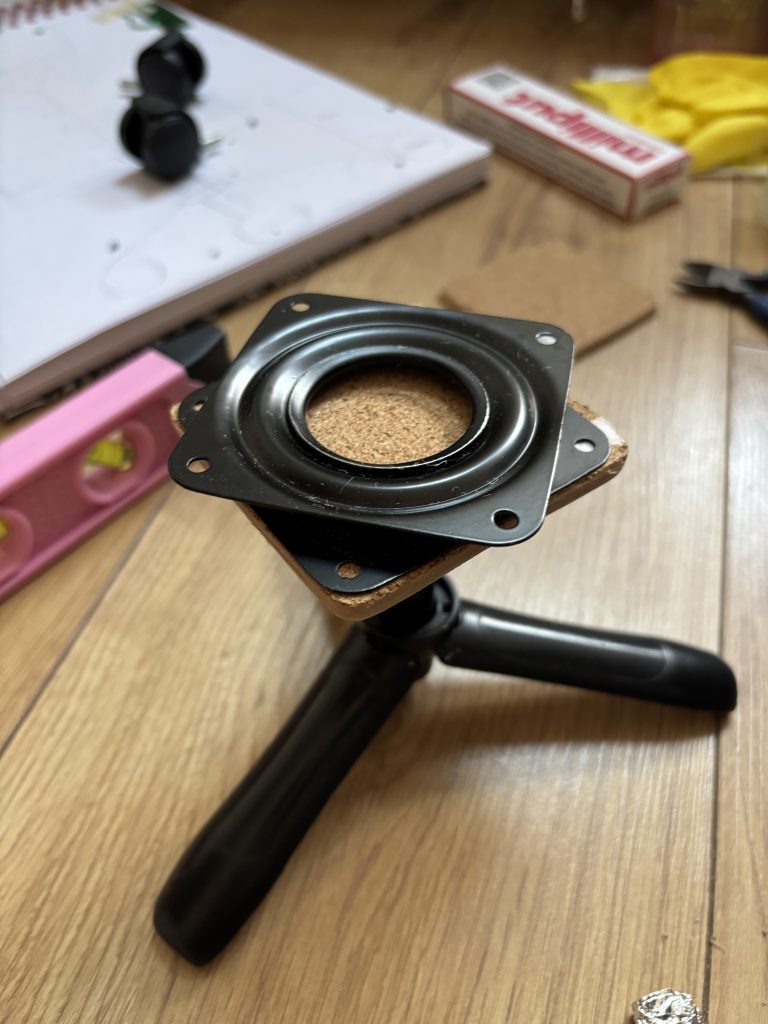
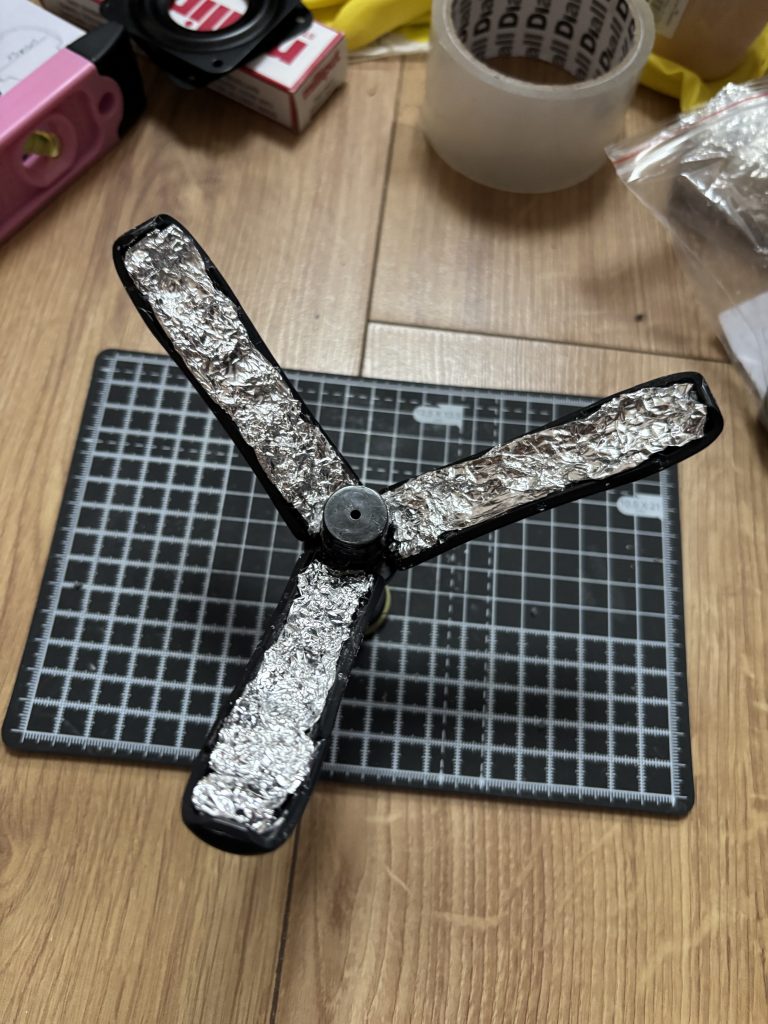
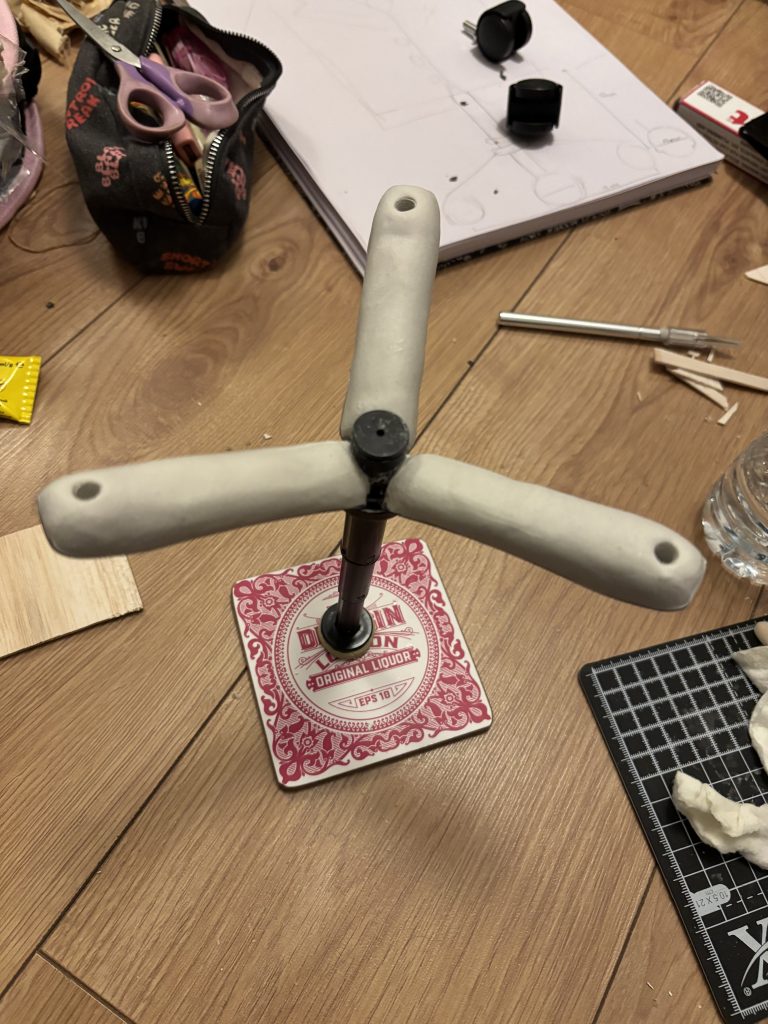
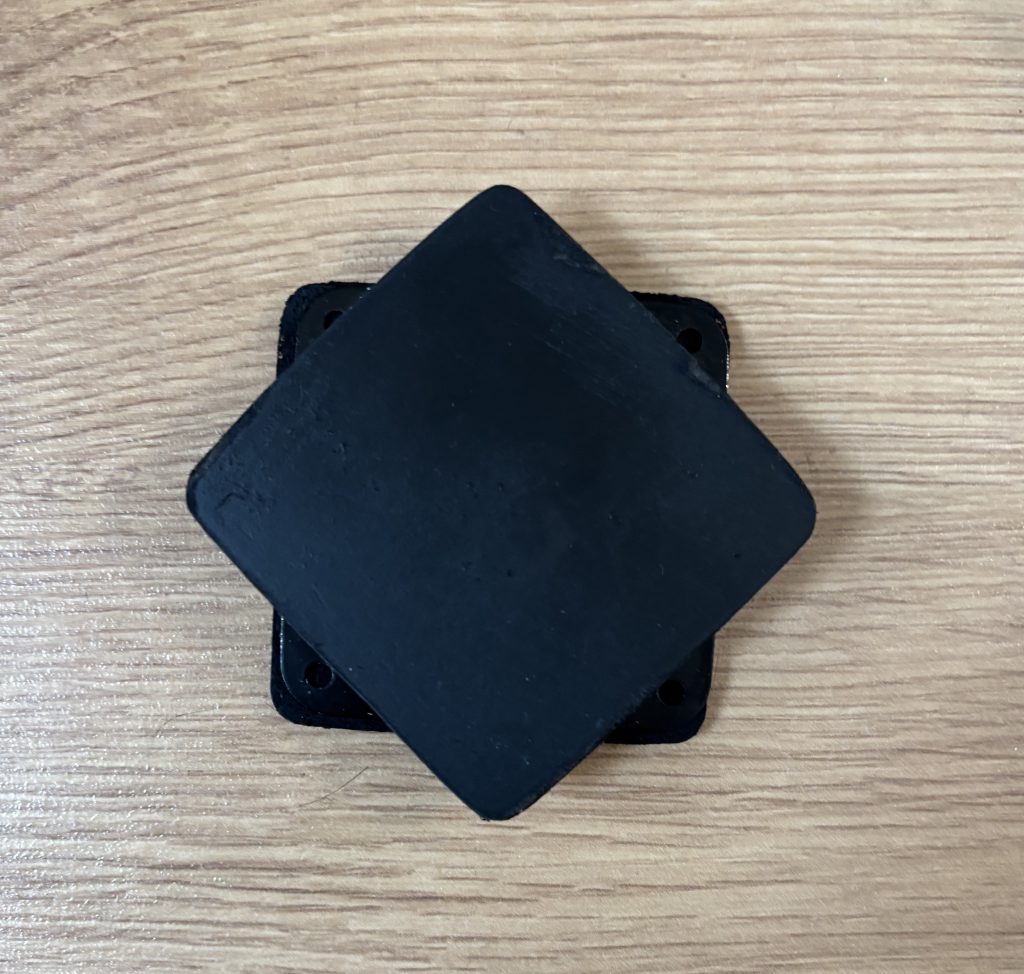
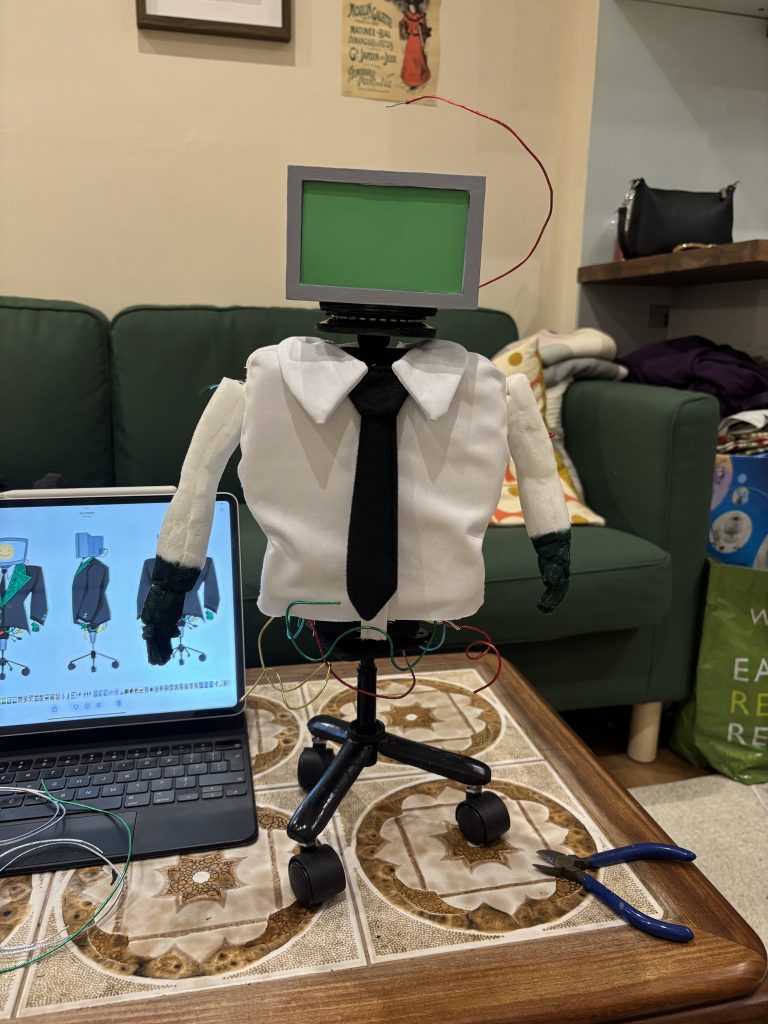
I started off with the bottom. I bought a small phone tripod off amazon and built on top of it to make it look more like the bottom of a chair, using foil, clay and paint. I also created a mini spinning mechanism with a rotating plate and old coasters I painted black.


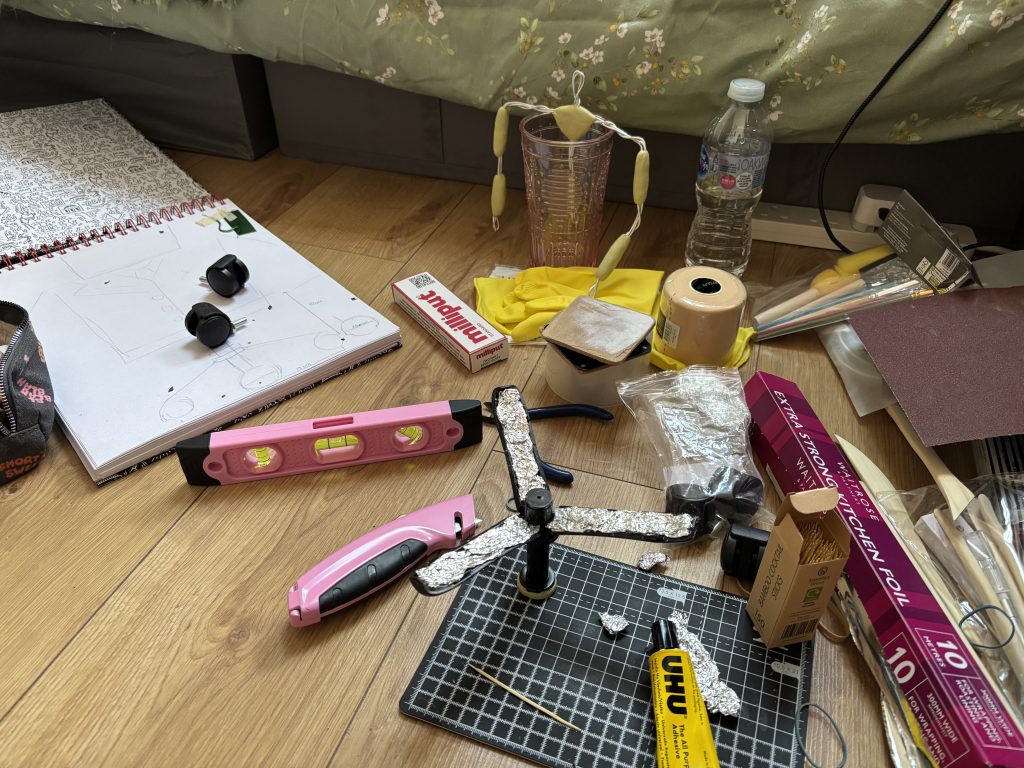
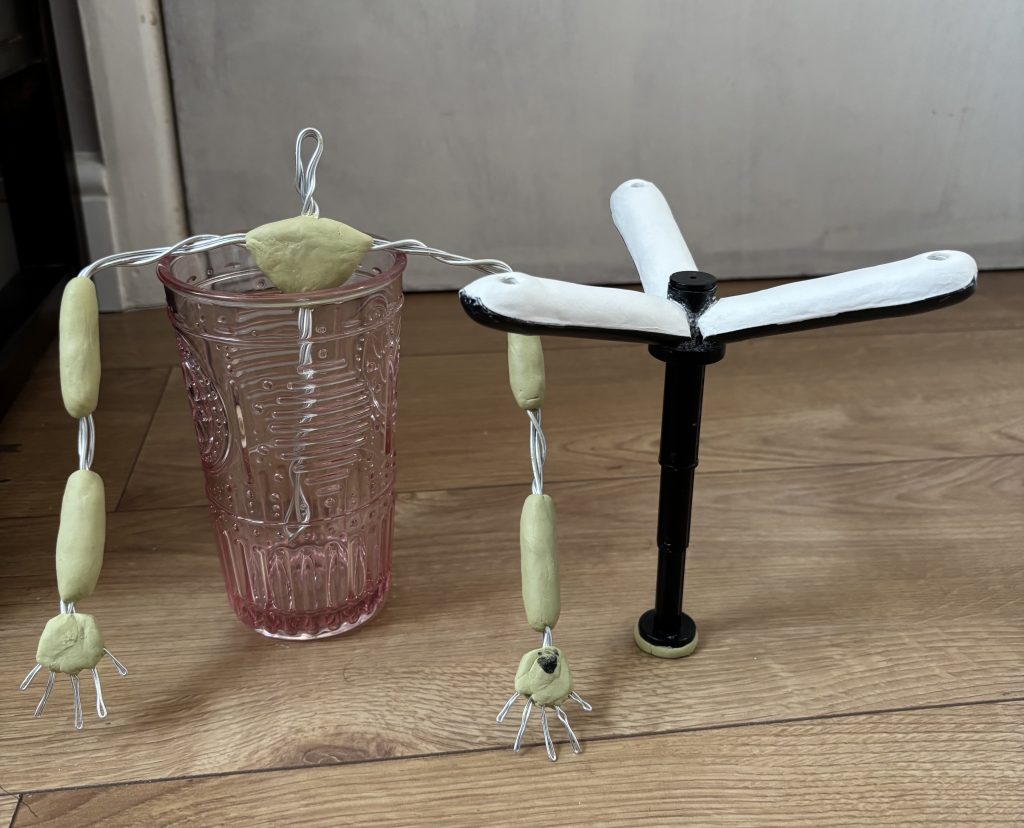
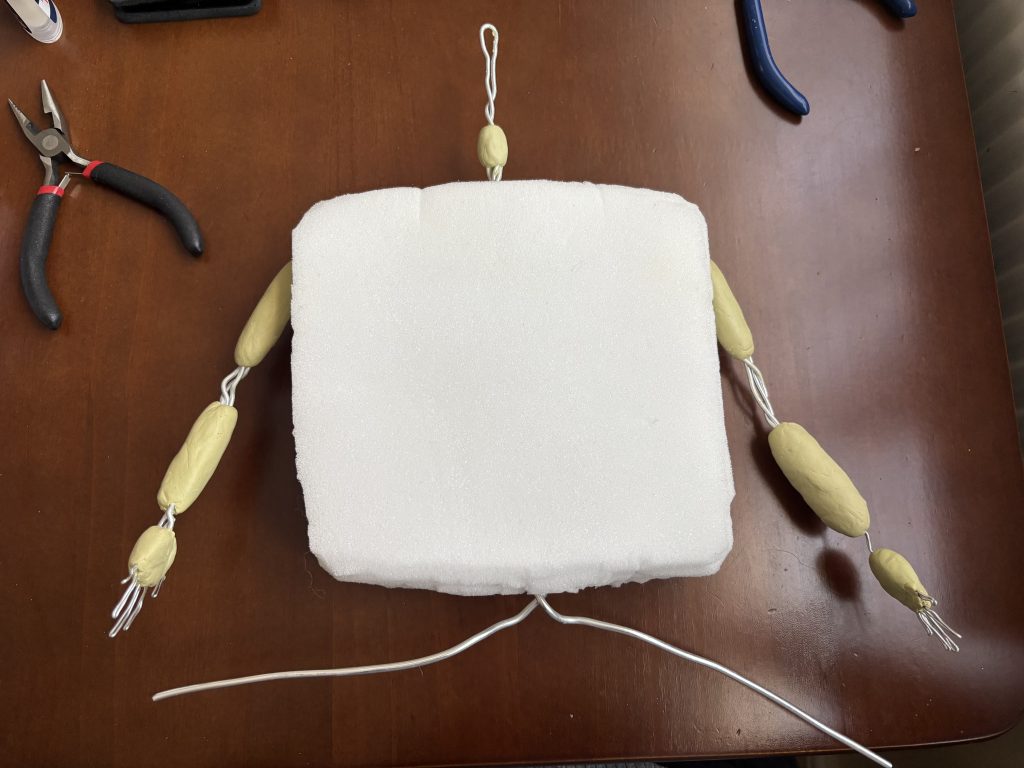
I created a wire armature out of aluminium wires and epoxy putty for the top half of the puppet, as this was where it would move/bend and have limbs.

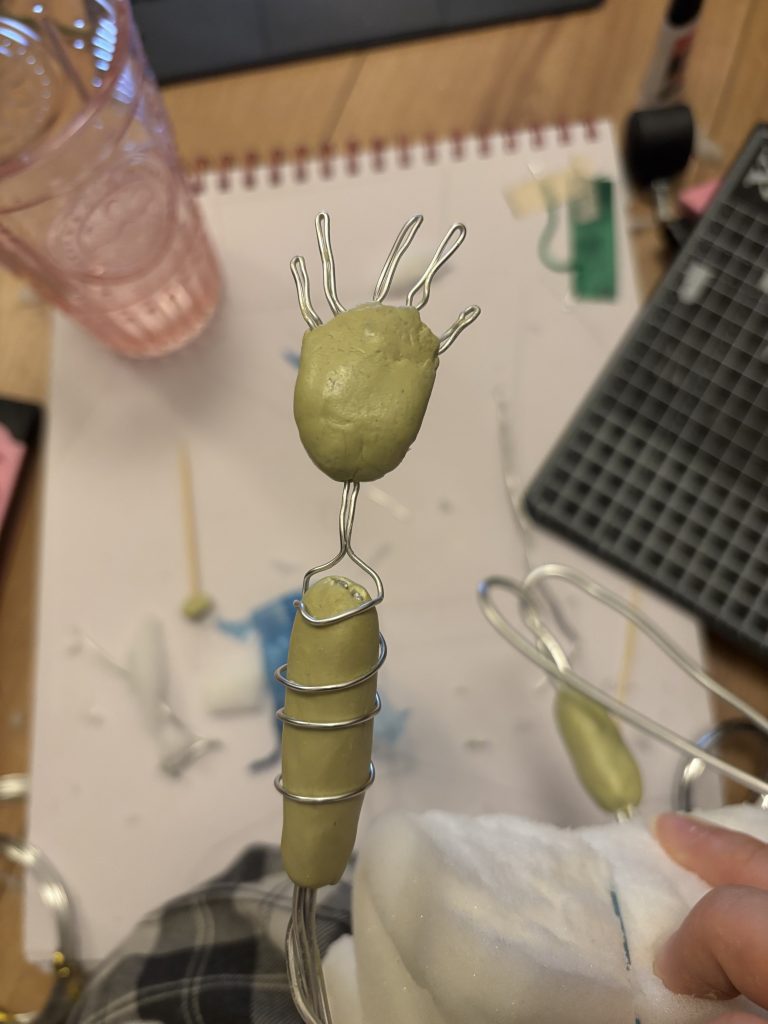
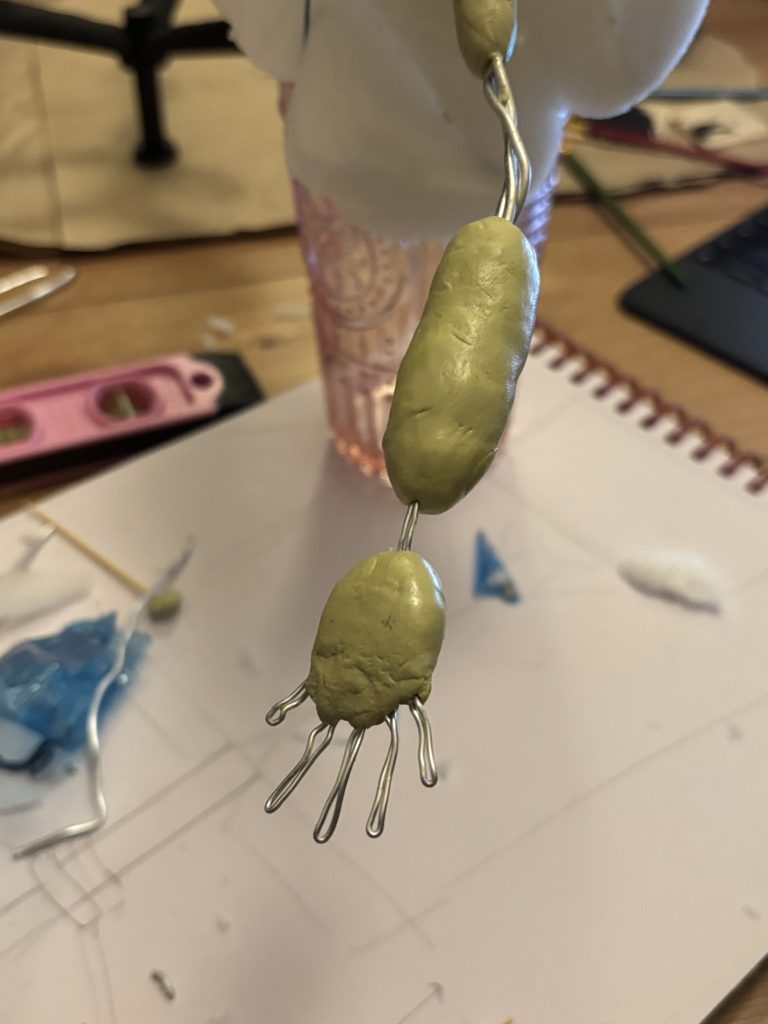
However, disaster struck! This was my first time making an armature so I used the wrong size wires! The thickness was good for big joints like the elbows and shoulders, but too stiff for the wrists. While moving the wrist it became brittle and snapped off. I tried to fix it with more wire and putty and it did stay on for a while longer…
I glued foam around the armature and shaped it to the size of the character by triming it with scissors.
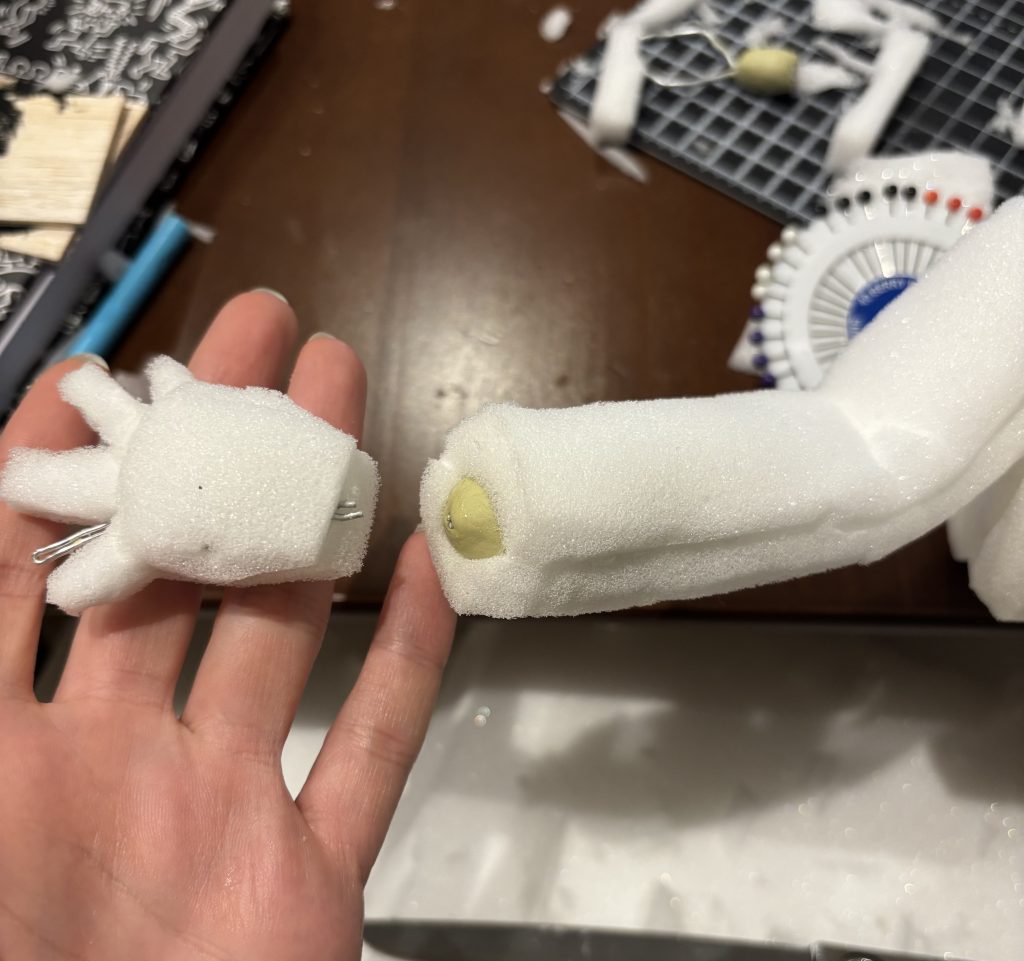
and then the wrist snapped off again :,) Since I made it too thick last time, I went with a thinner wire… But it was too thin now! At this point I’d stuck all the foam on and wouldn’t be able to fix the wrist back on without fusing it back into place, getting rid of that joint. This was alright as the character wasn’t going to be doing any complicated hand movements and the fingers still moved.

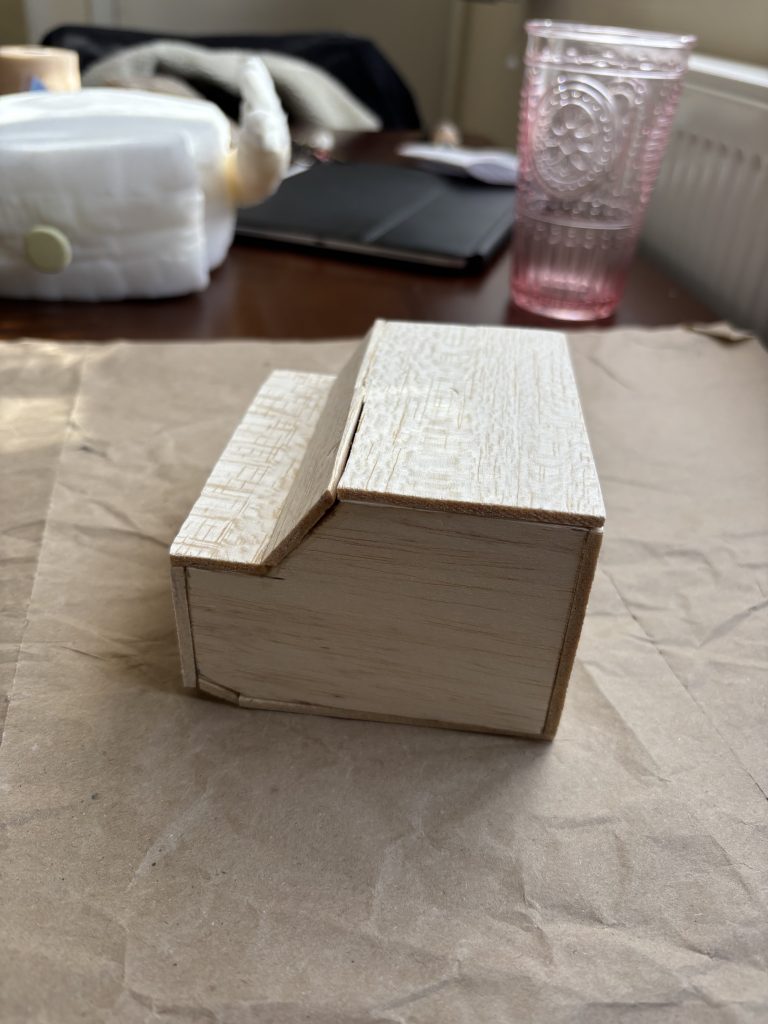
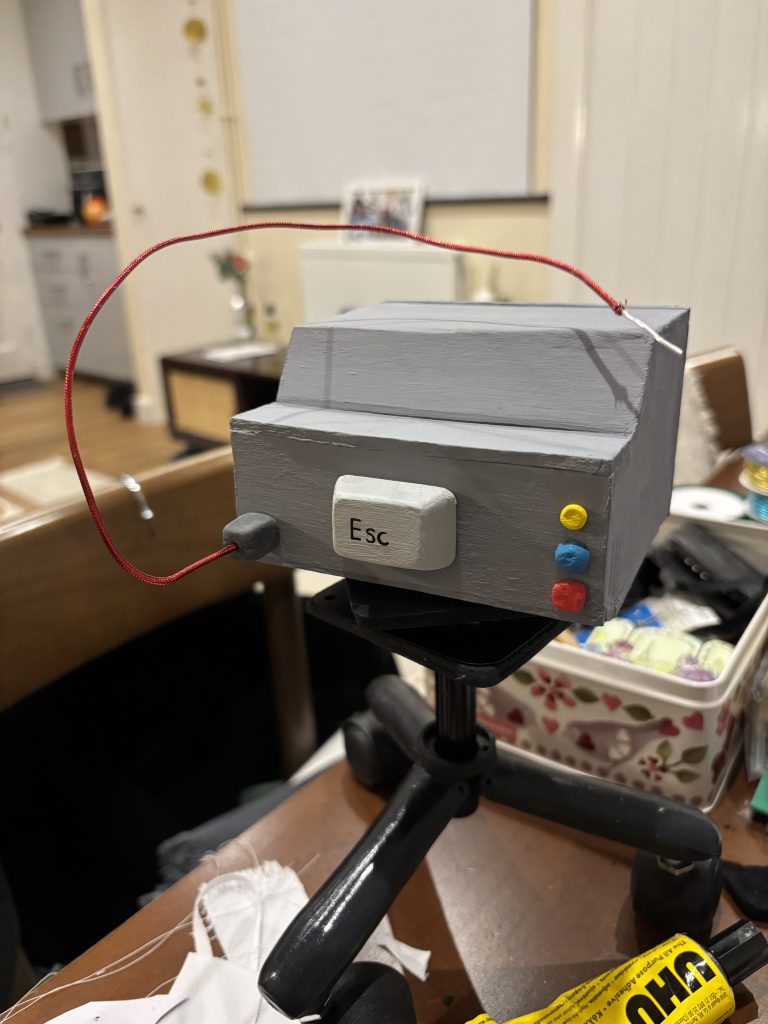
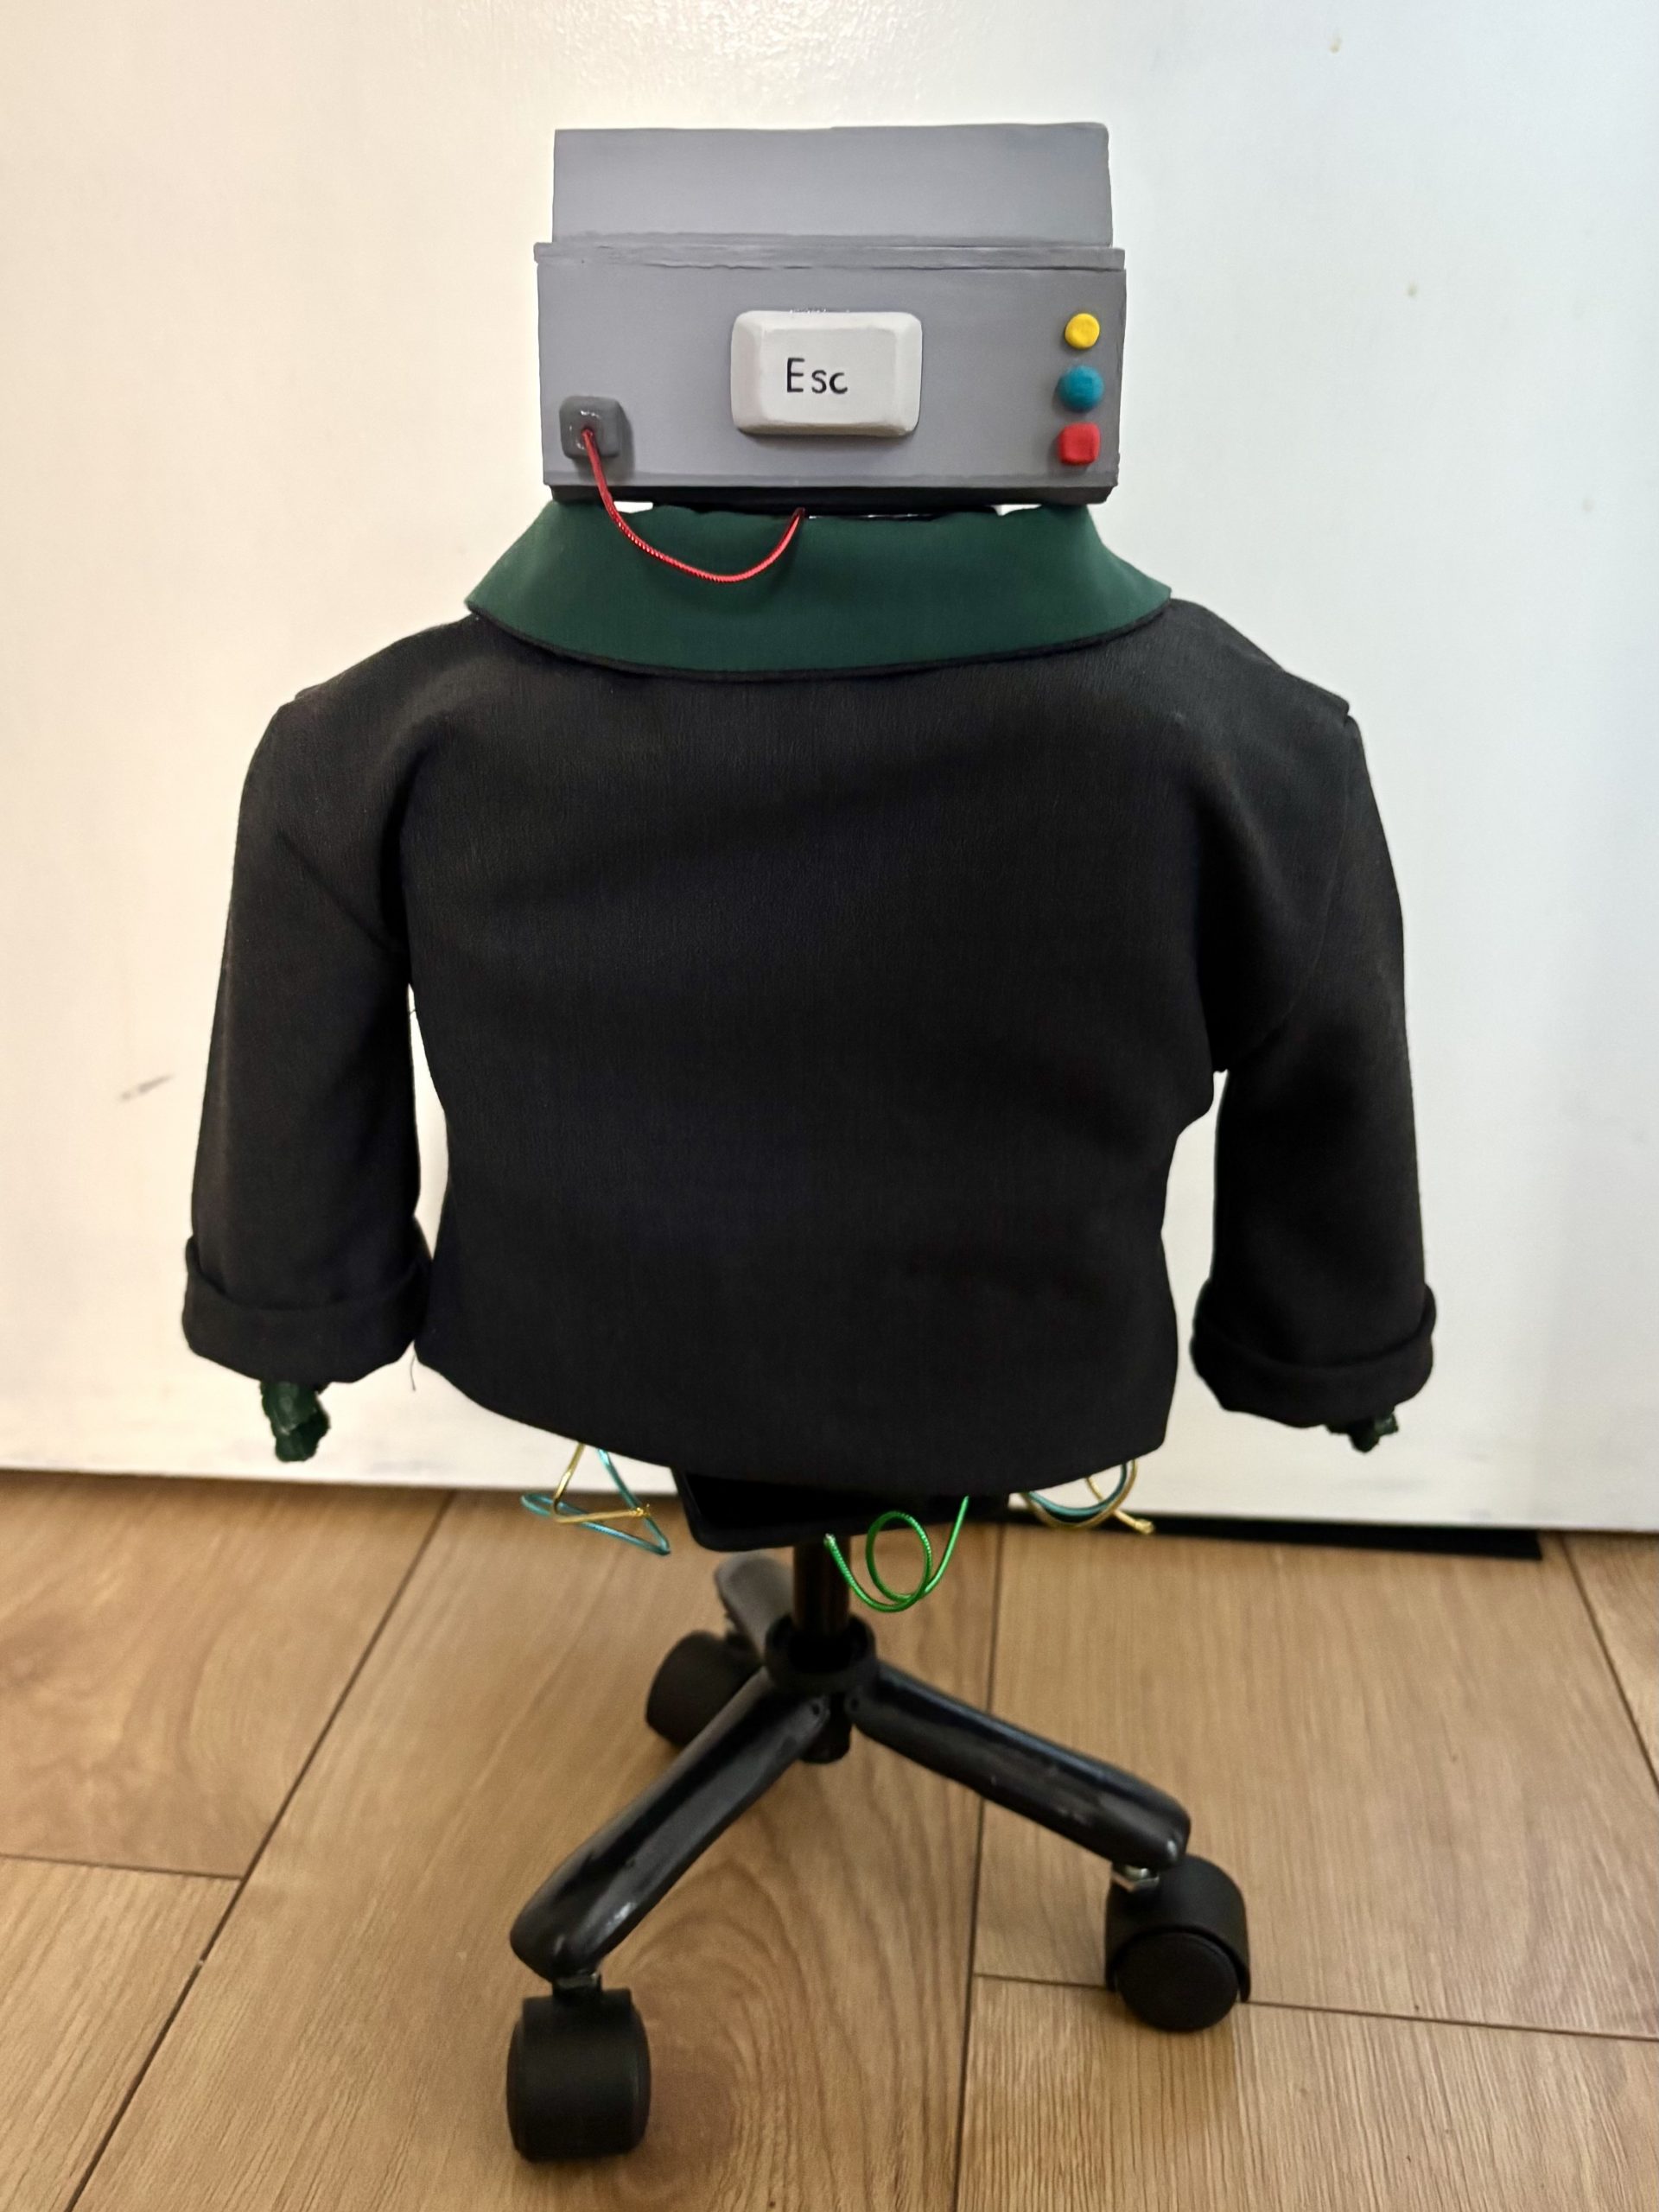
I made the head out of balsa wood as it is very lightweight and wouldn’t add more weight to the puppet. I used wood, super glue, acrylic paint, and air dry clay for the buttons on the back. The wires on this puppet were a small thread that I pulled the inside out of and replaced with very thin wire – making them posable too!
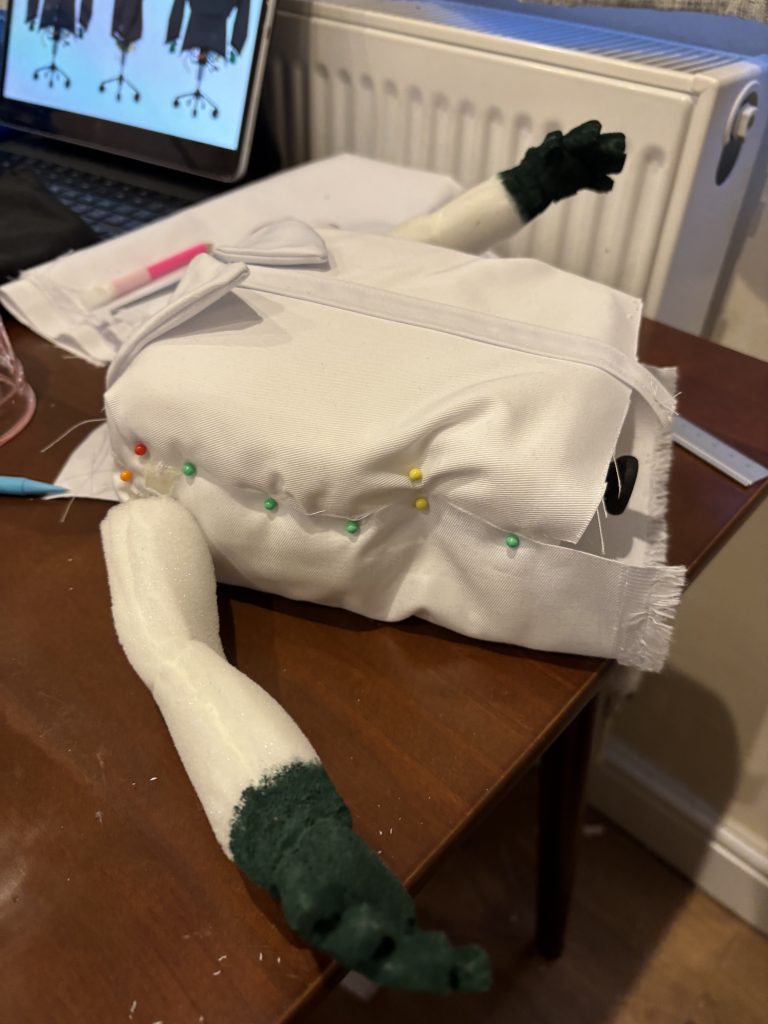
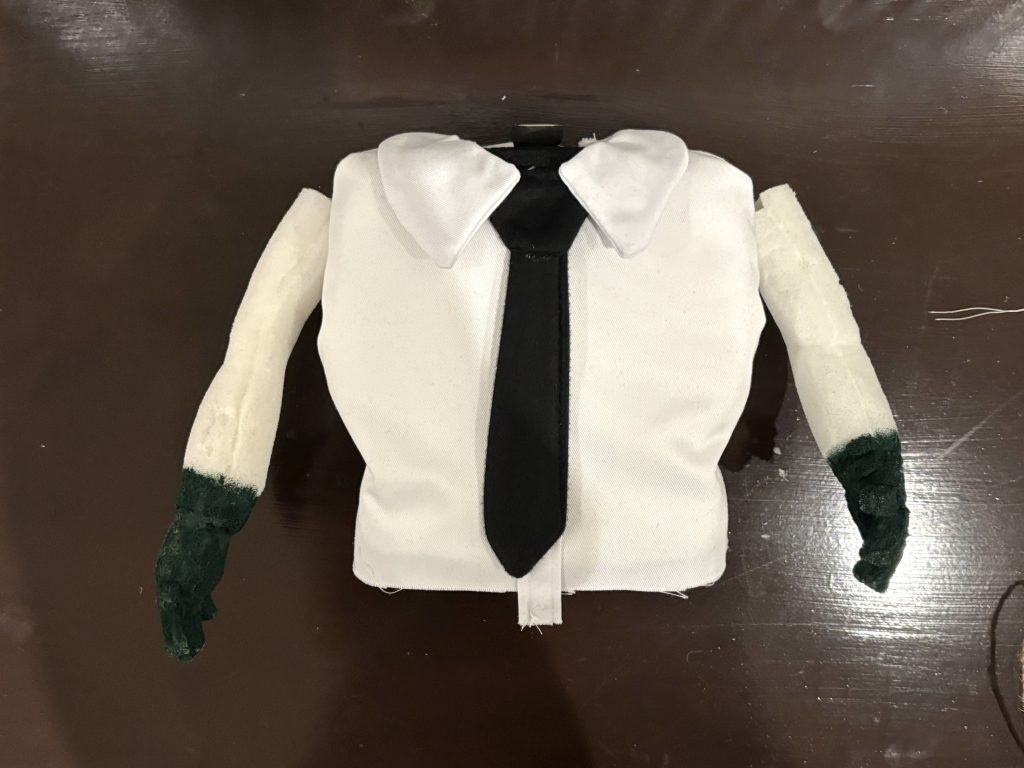
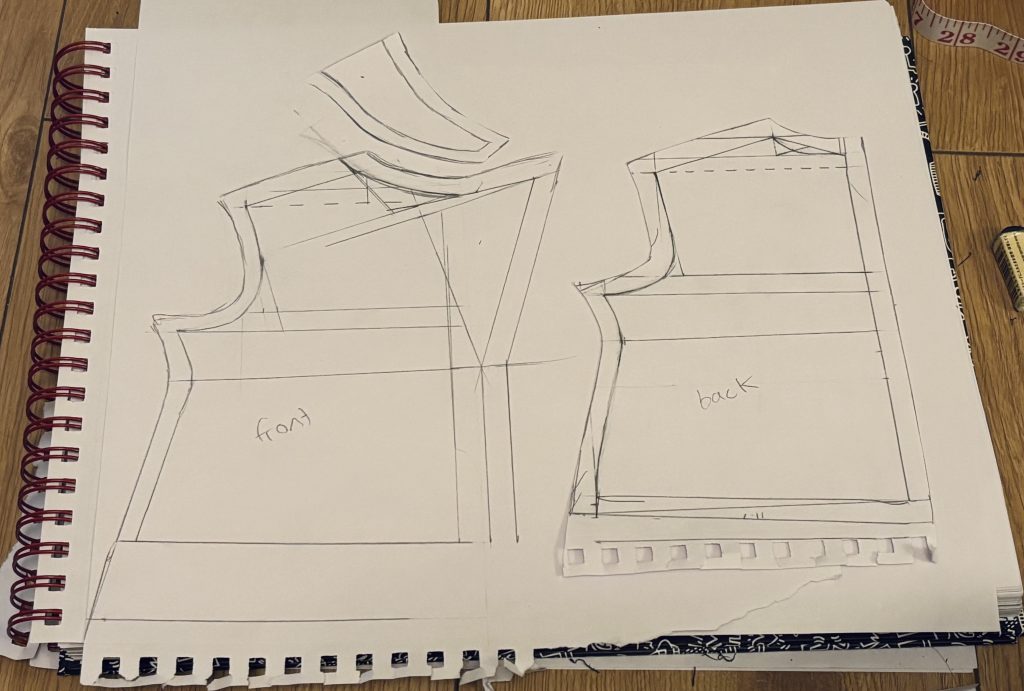
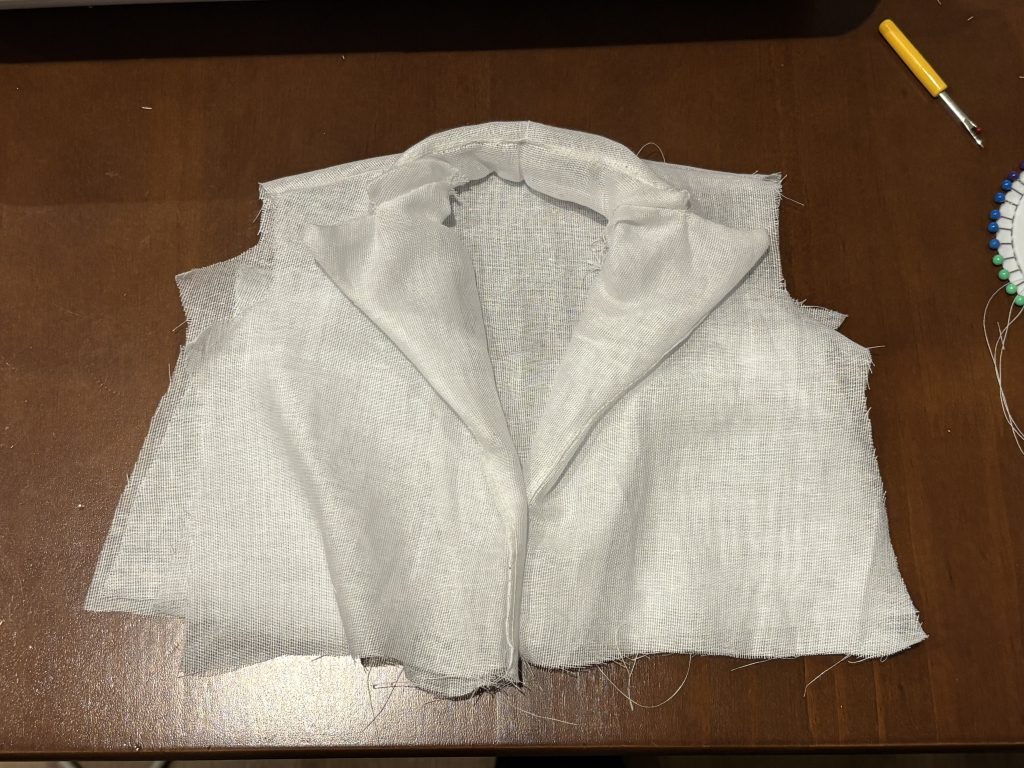
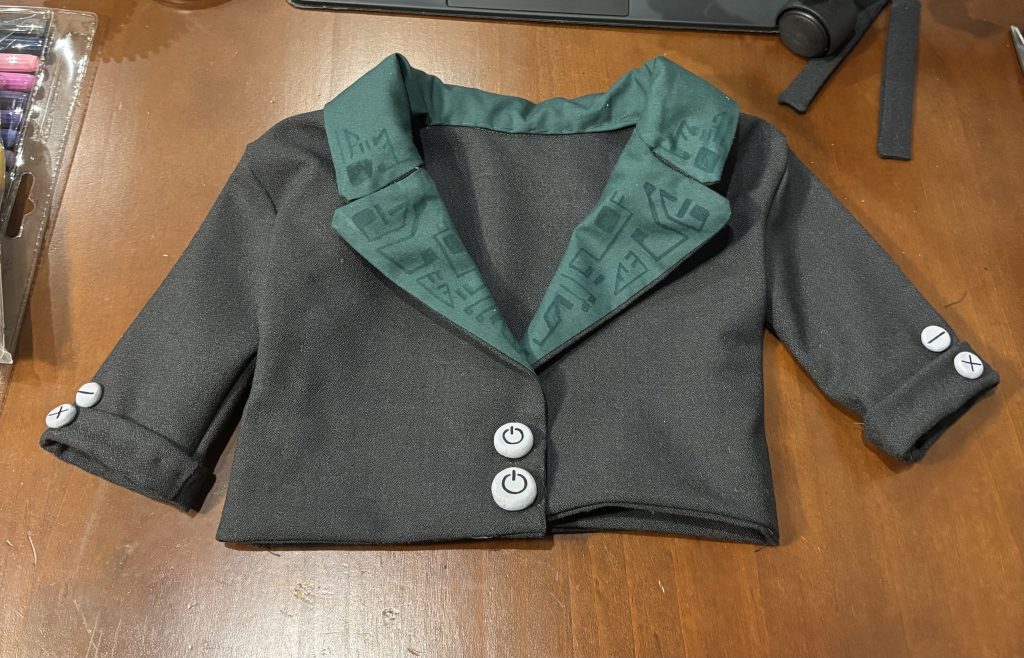
Making the clothes was also quite tricky! For the shirt I just glued down shirt fabric to the foam as only the middle and collar would be visible. I then created a pattern for the jacket using the puppets measurements and made a test one with thin fabric. I adjusted the pattern accordingly and created the final jacket! The lapel design was drawn on with fabric pens and I glued on some clay buttons.
FINAL PUPPET
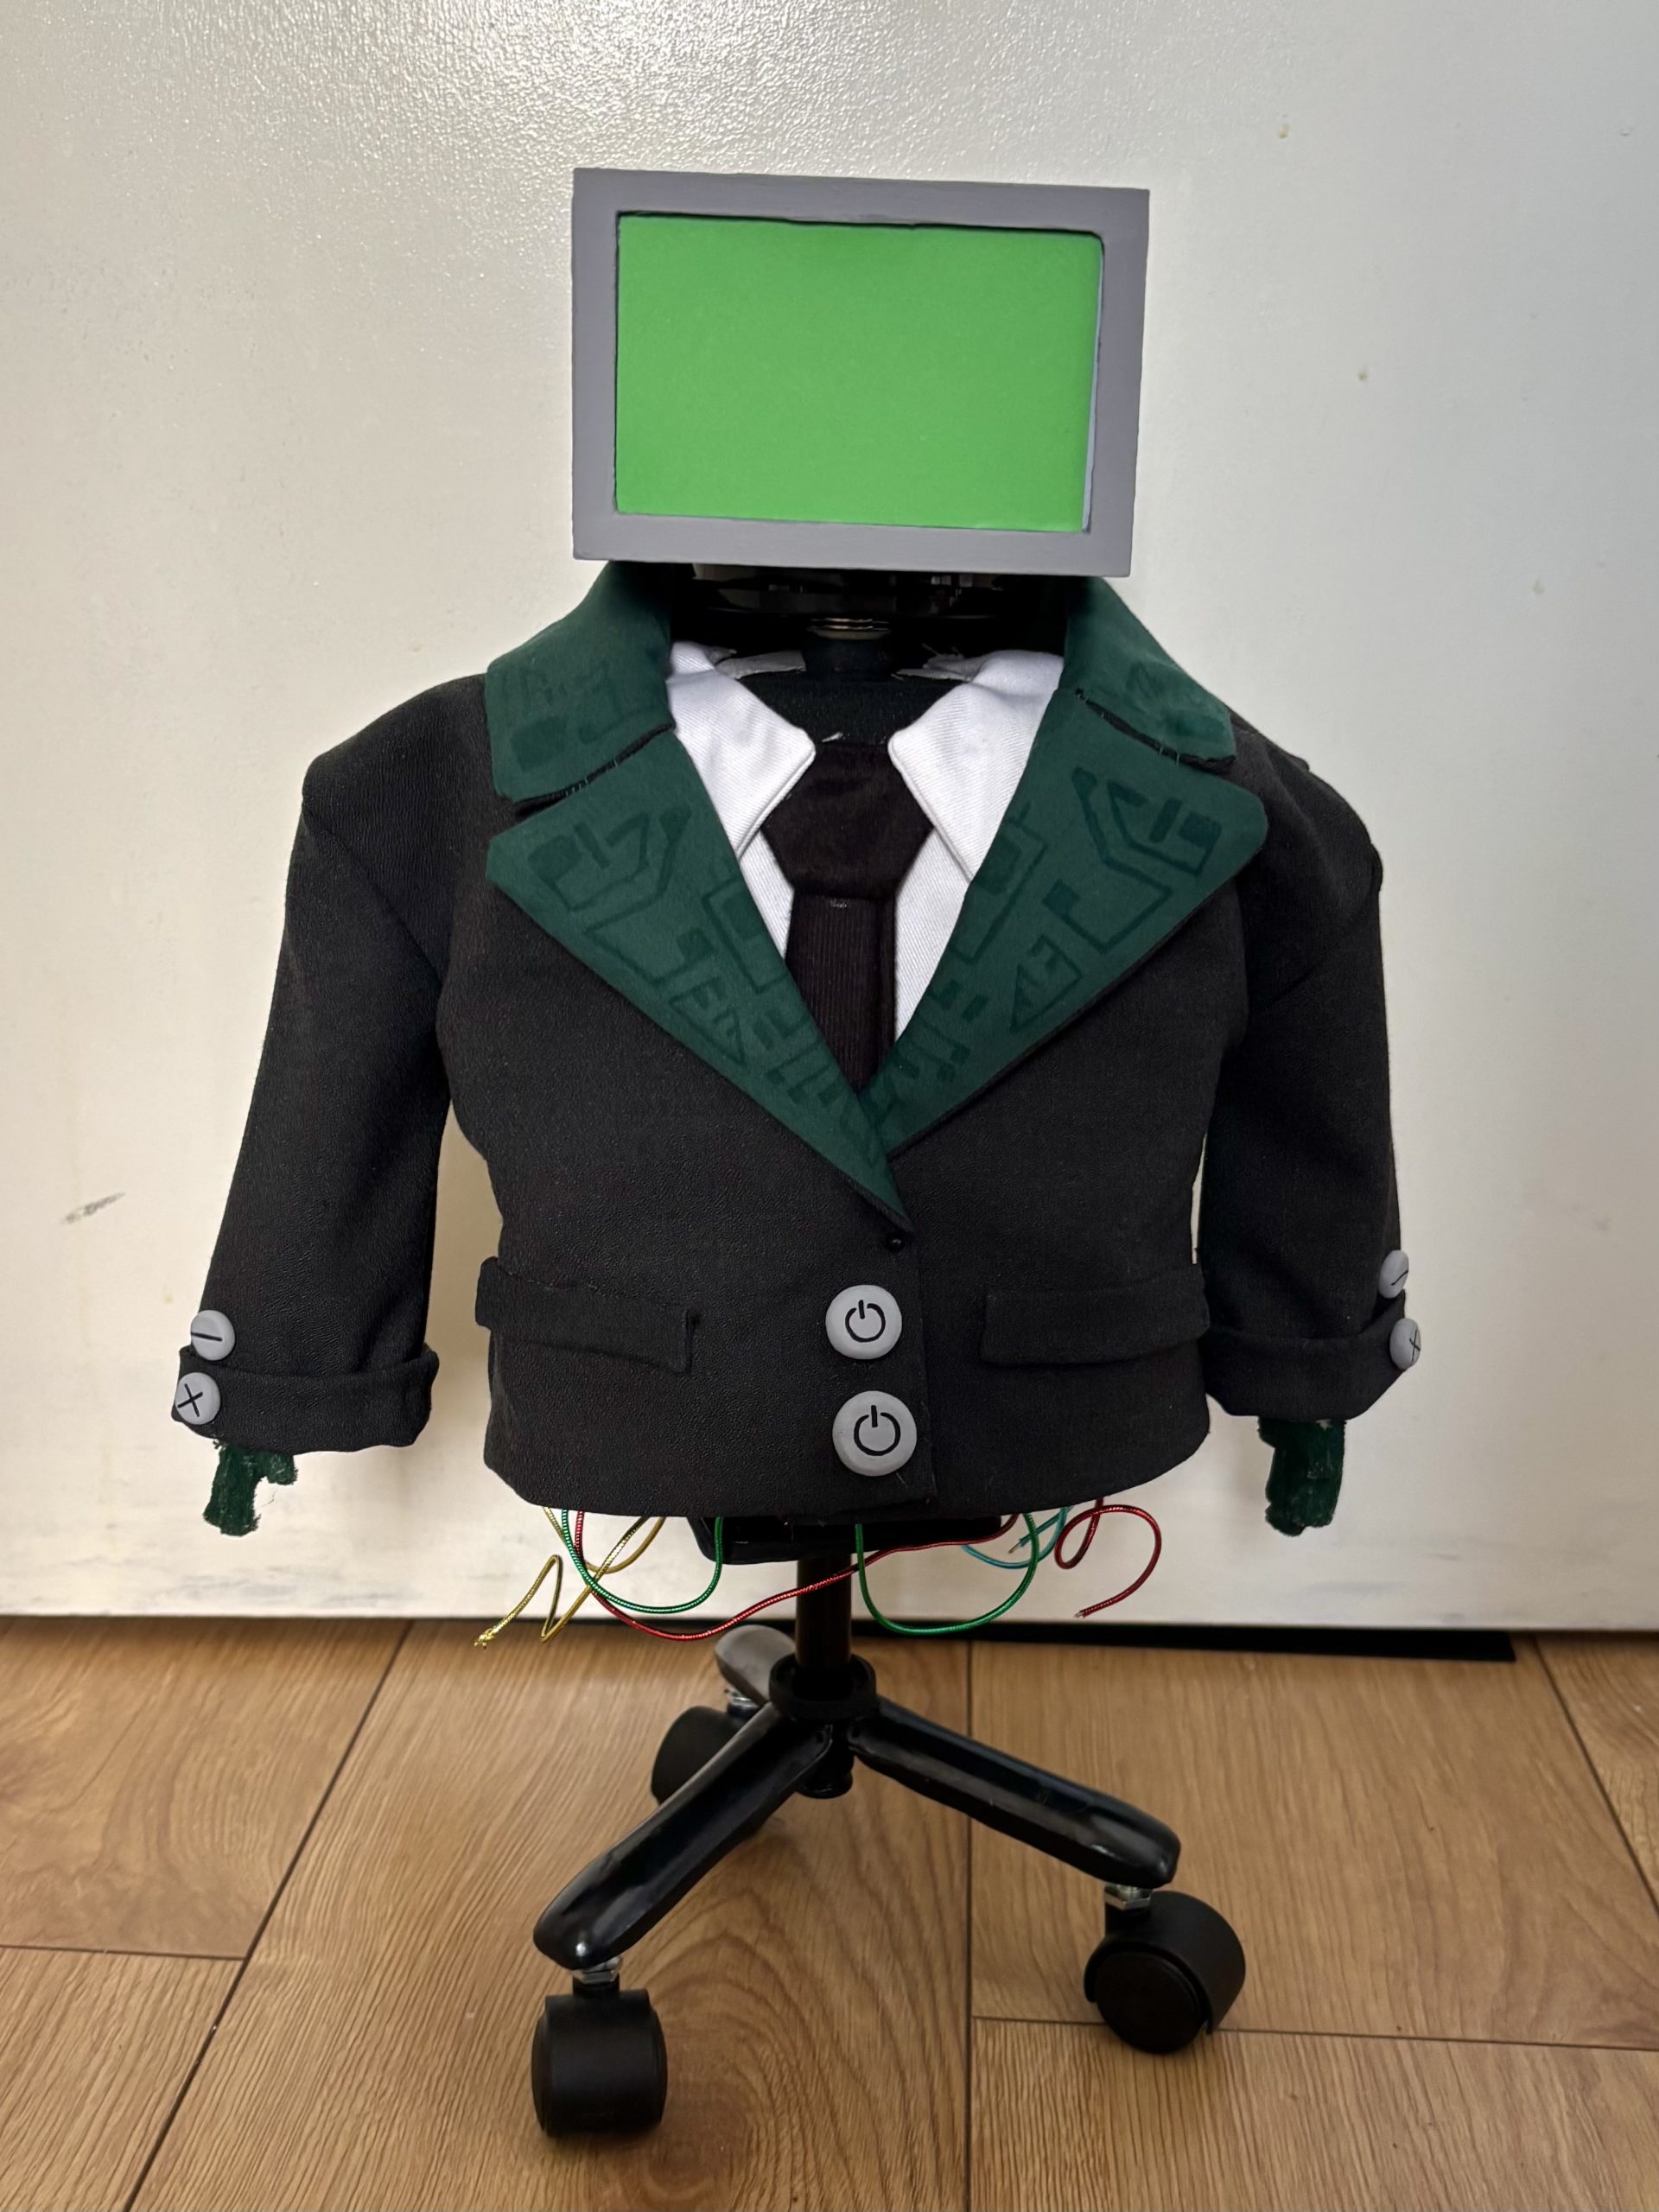

Although making this puppet was very challenging and had so many ups and downs through the process, I really enjoyed it! It was my favourite part of the project and I’d love to do more like this 🙂
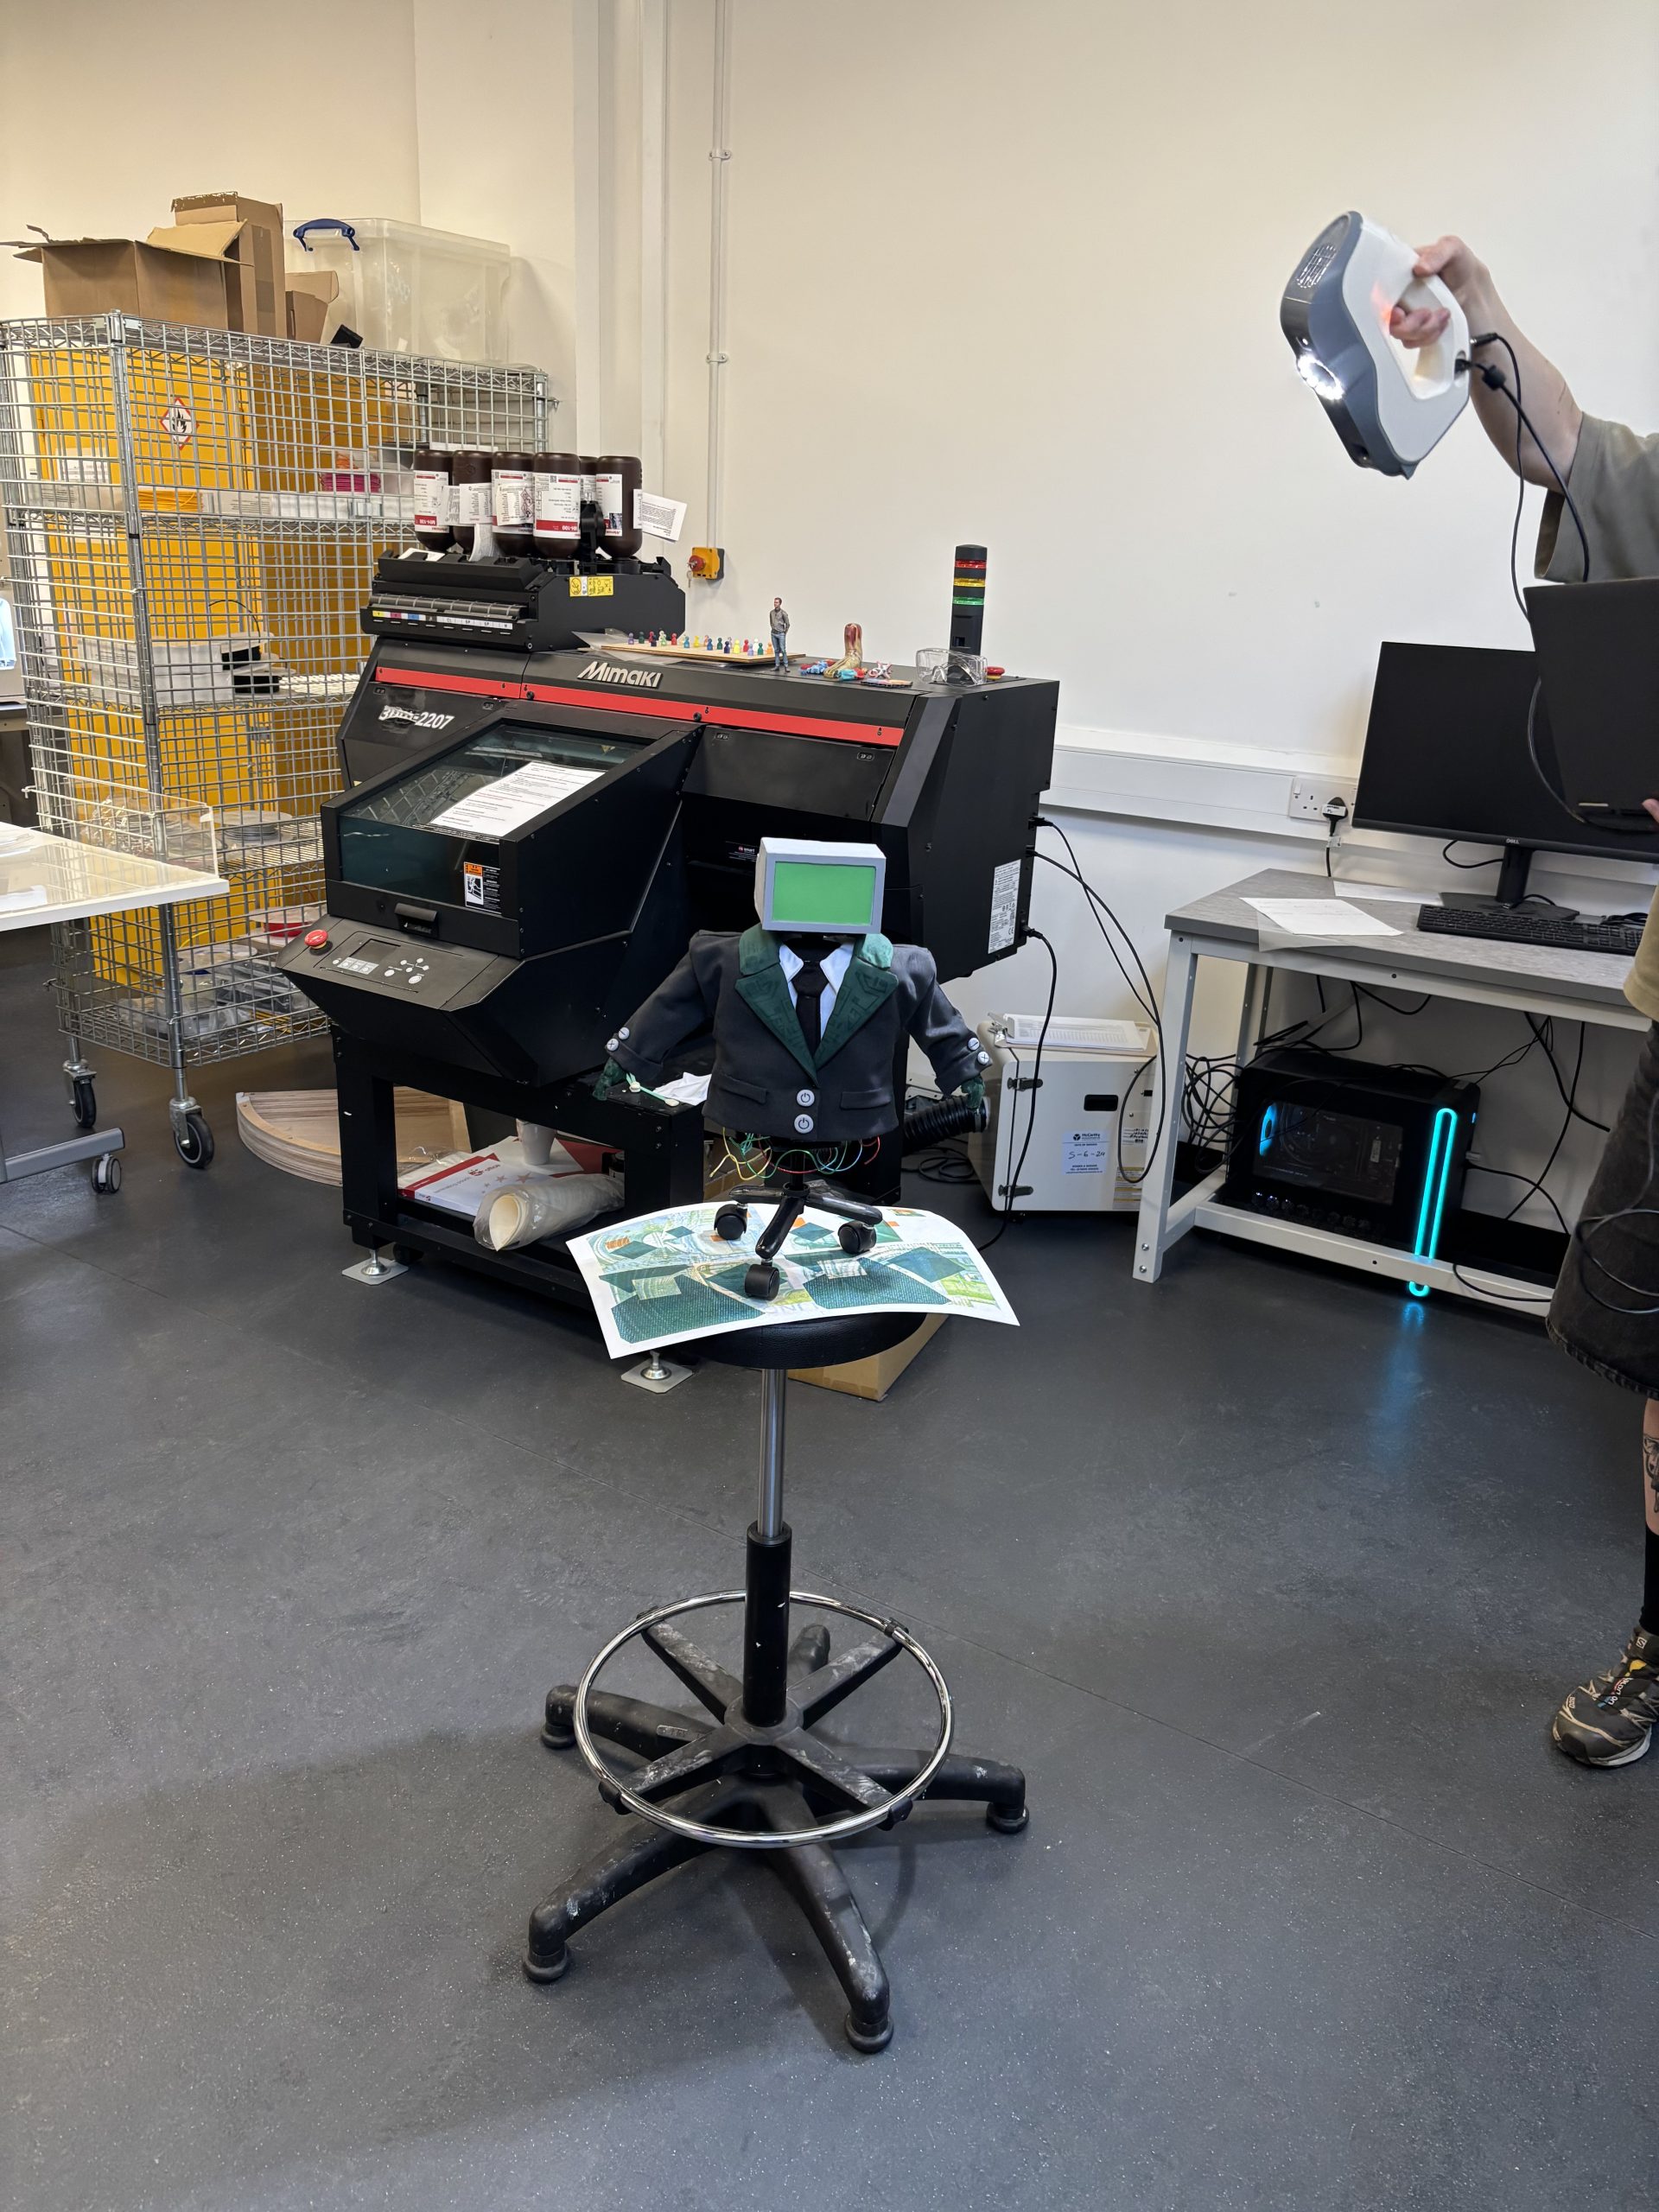
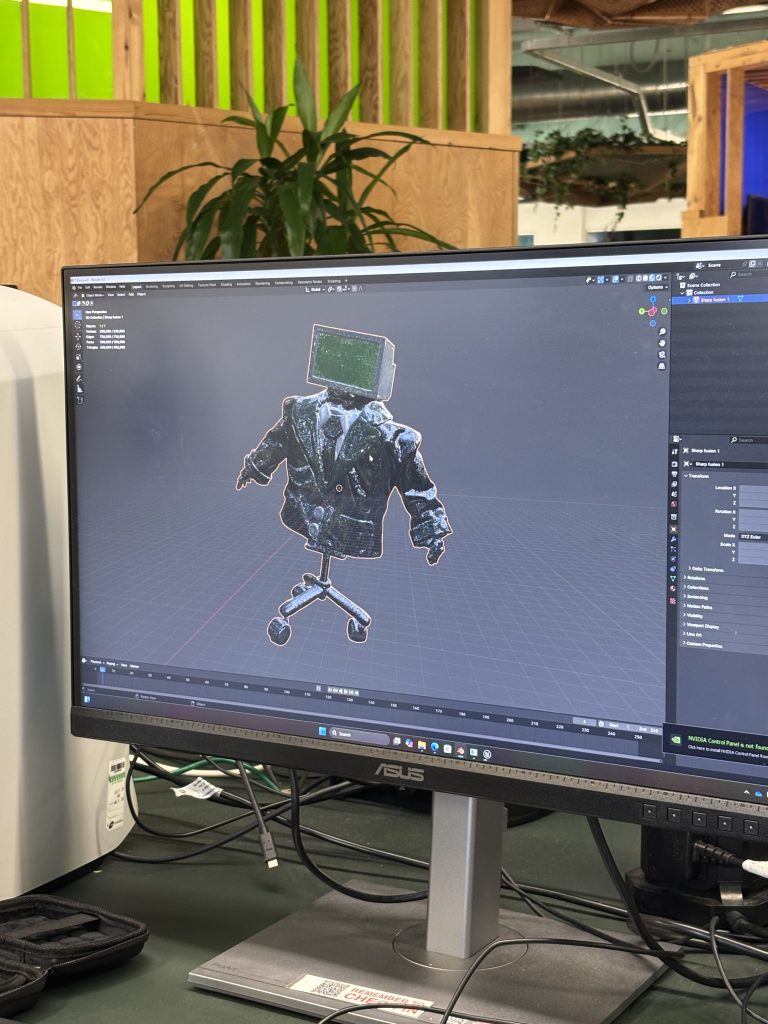
We then took the puppet to the 3D workshop to scan it into a 3D OBJ and put it into our final product.